

With local overrides, you can override HTTP response headers and web content, including XHR and fetch requests, to mock remote resources even if you don't have access to them. This lets you prototype changes without waiting for the backend to support them. Local overrides also lets you keep the changes you make in DevTools across page loads.
How it works:
- When you make changes in DevTools, DevTools saves a copy of the modified file to a folder you specify.
- When you reload the page, DevTools serves the local, modified file, rather than the network resource.
Limitations
Local overrides work for network response headers and for most file types, including XHR and fetch requests, with a couple of exceptions:
- Cache is disabled when Local overrides are enabled.
- DevTools doesn't save changes made in the DOM tree of the Elements panel.
- If you edit CSS in the Styles pane, and the source of that CSS is an HTML file, DevTools won't save the change.
Instead, you can edit HTML files in the Sources panel.
Set up local overrides
You can override web content or response headers right away in the Network panel:
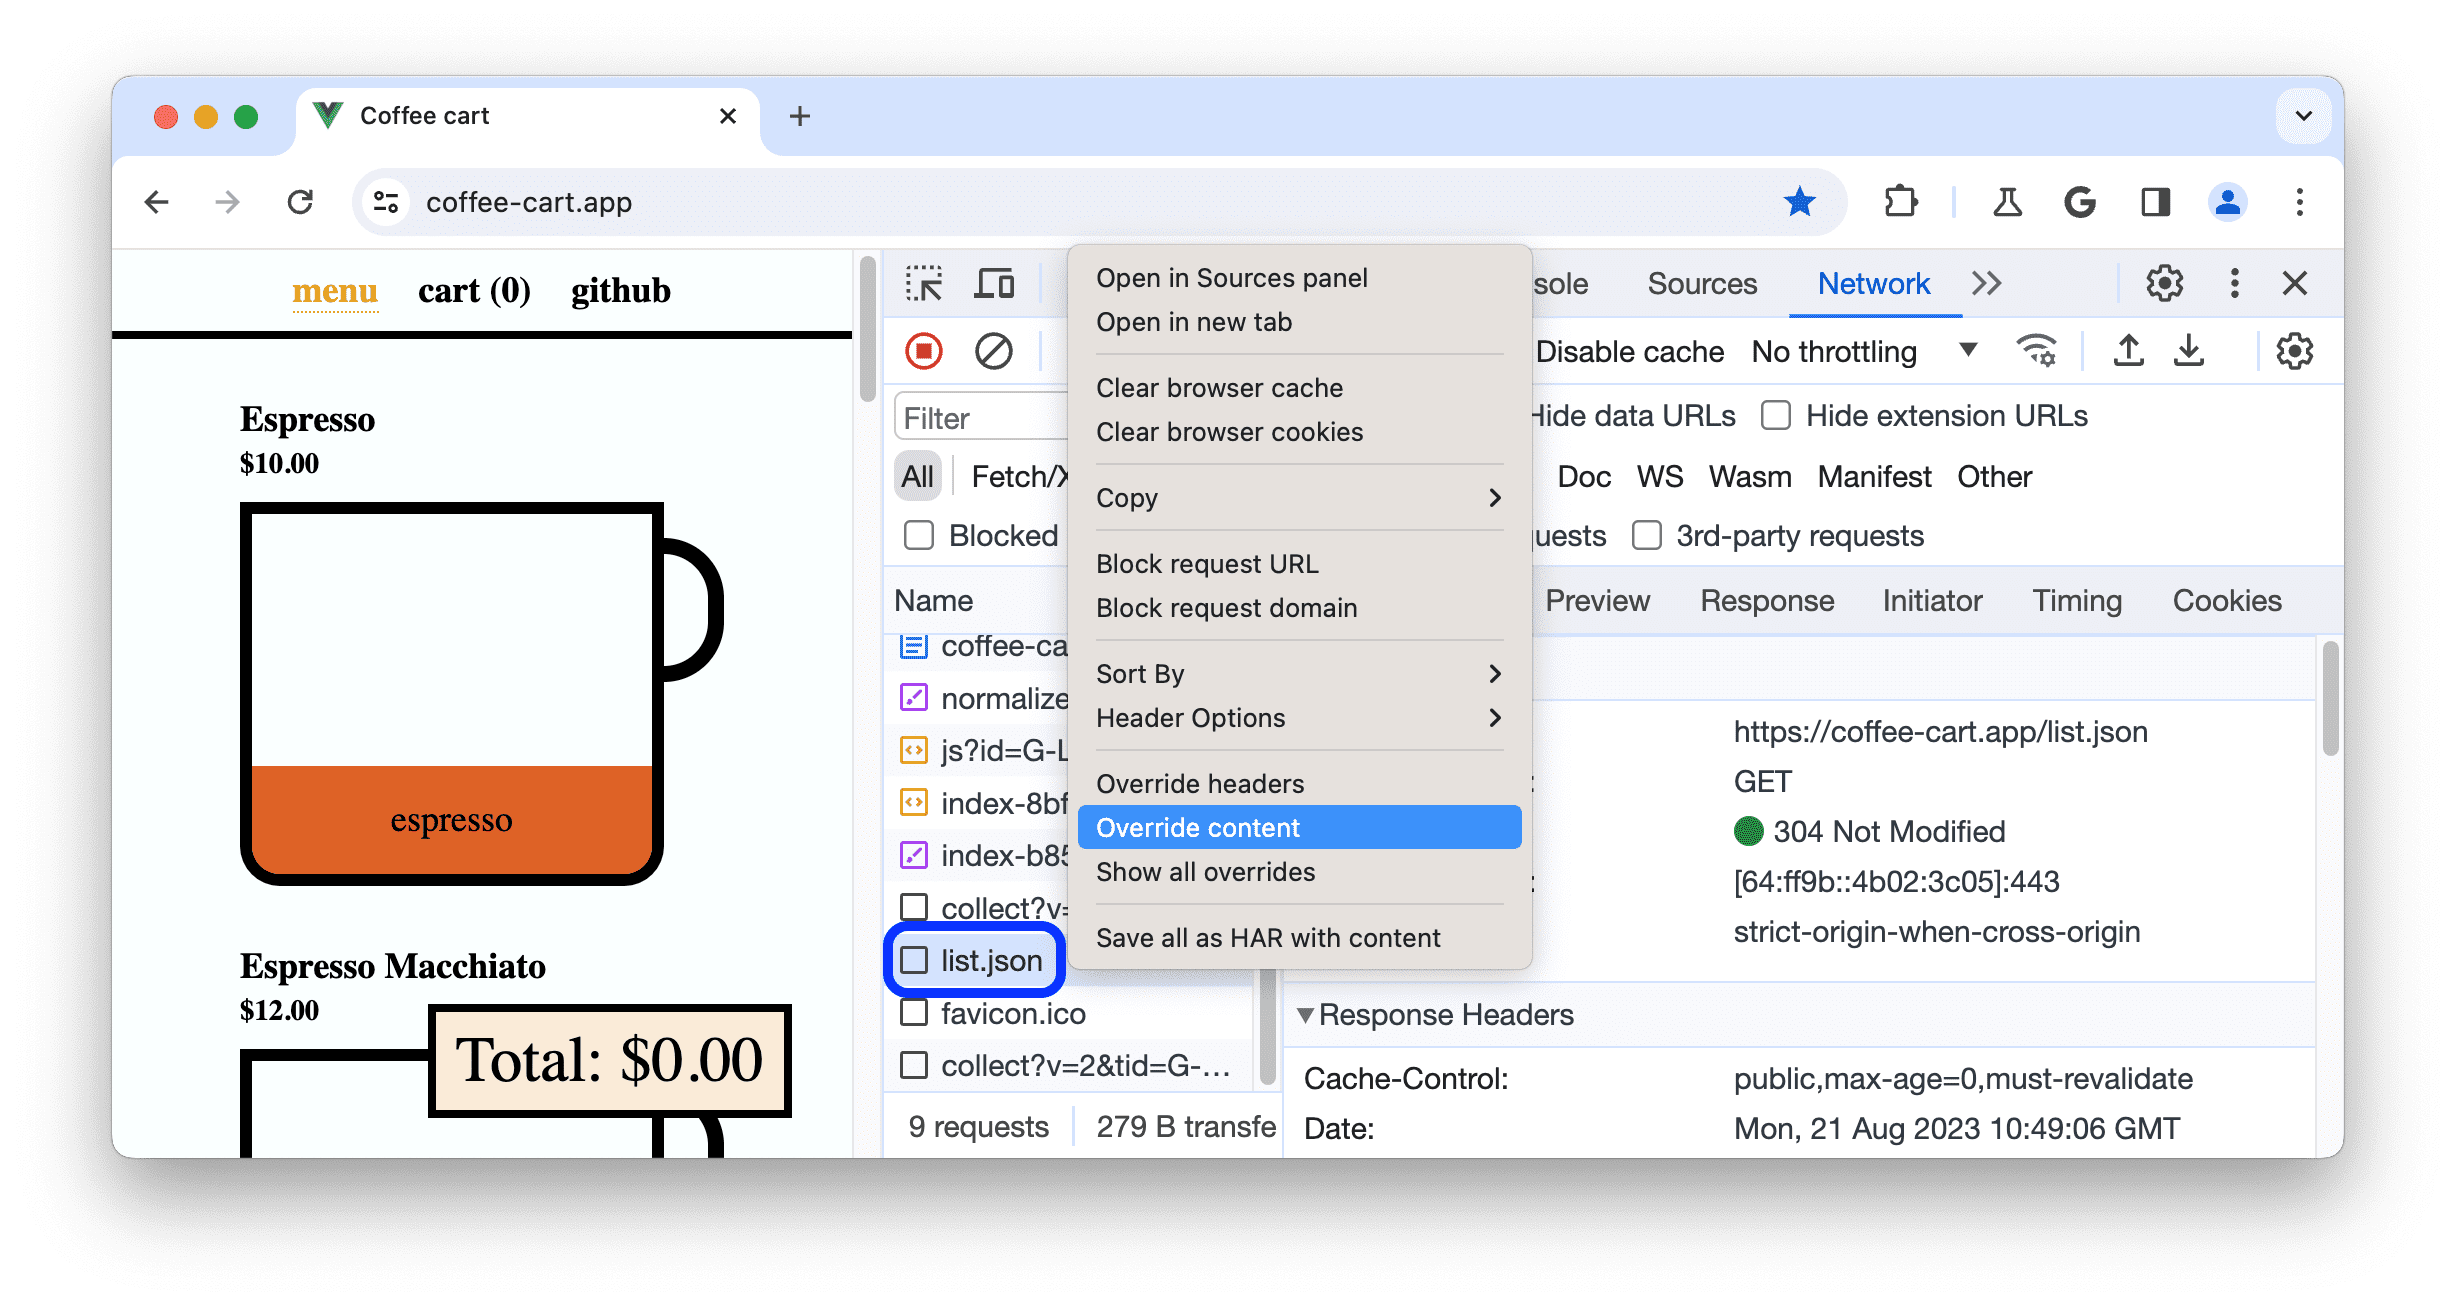
- Open DevTools, navigate to the Network panel, right-click a request you want to override, choose Override headers or Override content from the drop-down menu.
- If you haven't set up local overrides yet, in the action bar at the top, DevTools prompts you to:
- Select a folder to store the override files in.

- Click Allow to grant DevTools access rights to it.

- Select a folder to store the override files in.
- If you have local overrides set up but disabled, DevTools automatically enables them.
Once local overrides are set up and enabled, depending on what you are about to override, DevTools takes you to:
- The Sources panel to let you make changes to web content.
- The editor in Network > Headers > Response Headers to let you make changes to response headers.
To temporarily disable local overrides or delete all the override files, navigate to Sources > Overrides and clear the Enable Local Overrides checkbox or click Clear respectively.
To delete a single override file or all overrides in a folder, right-click the file or folder in Sources > Overrides, select Delete, then click OK in the dialog. This action can't be undone and you will have to manually recreate the deleted overrides.
To quickly see all overrides, in the Network panel, right-click a request and select Show all overrides. DevTools will take you to Sources > Overrides.
Override web content
To override web content:
- Set up local overrides.
- Make changes to files and save them in DevTools.
For example, you can edit files in Sources or CSS in Elements > Styles, unless the CSS lives in HTML files.
DevTools saves the modified files, lists them in Sources > Overrides, and shows you the ![]() icon next to the overridden files in the relevant panels and panes: Elements > Styles, Network, and Sources > Overrides.
icon next to the overridden files in the relevant panels and panes: Elements > Styles, Network, and Sources > Overrides.
![]()
Additionally, the Network panel shows a purple dot icon with a tooltip next to the Response tab of a request with overridden web content.

Override XHR or fetch requests to mock remote resources
With local overrides, you don't need access to the backend and don't have to wait for it to support your changes. Mock and experiment on the fly:
- Set up local overrides.
- In Network, filter for XHR/fetch requests, find the one you need, right-click it, and select Override content.
- Make your changes to the fetched data and save the file.
- Refresh the page and observe your changes applied.
To learn this workflow, watch the following video:
Track your local changes
You can keep track of all the changes you make to web content in one place—the Changes drawer tab.
Override HTTP response headers
From the Network panel, you can override HTTP response headers without access to the web server.
With response header overrides, you can locally prototype fixes for various headers, including but not limited to:
- Cross-Origin Resource Sharing (CORS) Headers
- Permissions-Policy Headers
- Cross-Origin Isolation Headers
To override a response header:
- Set up local overrides and inspect, for example, this demo page.
- Go to Network, find a request, right-click it, and select Override headers. DevTools takes you to the Headers > Response Headers editor.
Hover over a response header value and place a cursor there.

Alternatively, to enable the Response Headers editor, hover over a response header value and click Edit.
Modify or add a new header.

- To edit a header value, click it.
- To add a new header, click Add header.
- To remove a header override, click next to it. This removes the headers you added or reverts modified values back to original values.
The Network panel highlights modified headers in green and removed overrides in red and crossed out. Additionally, the Headers tab shows a purple dot icon with a tooltip to let you know that headers are overridden.
Refresh the page to apply the changes.
Edit all response header overrides
To edit all header overrides in one place:
Click
 .headers next to the Response Headers section.
DevTools takes you to the corresponding
.headersfile in Sources > Overrides.Edit the
.headersfile: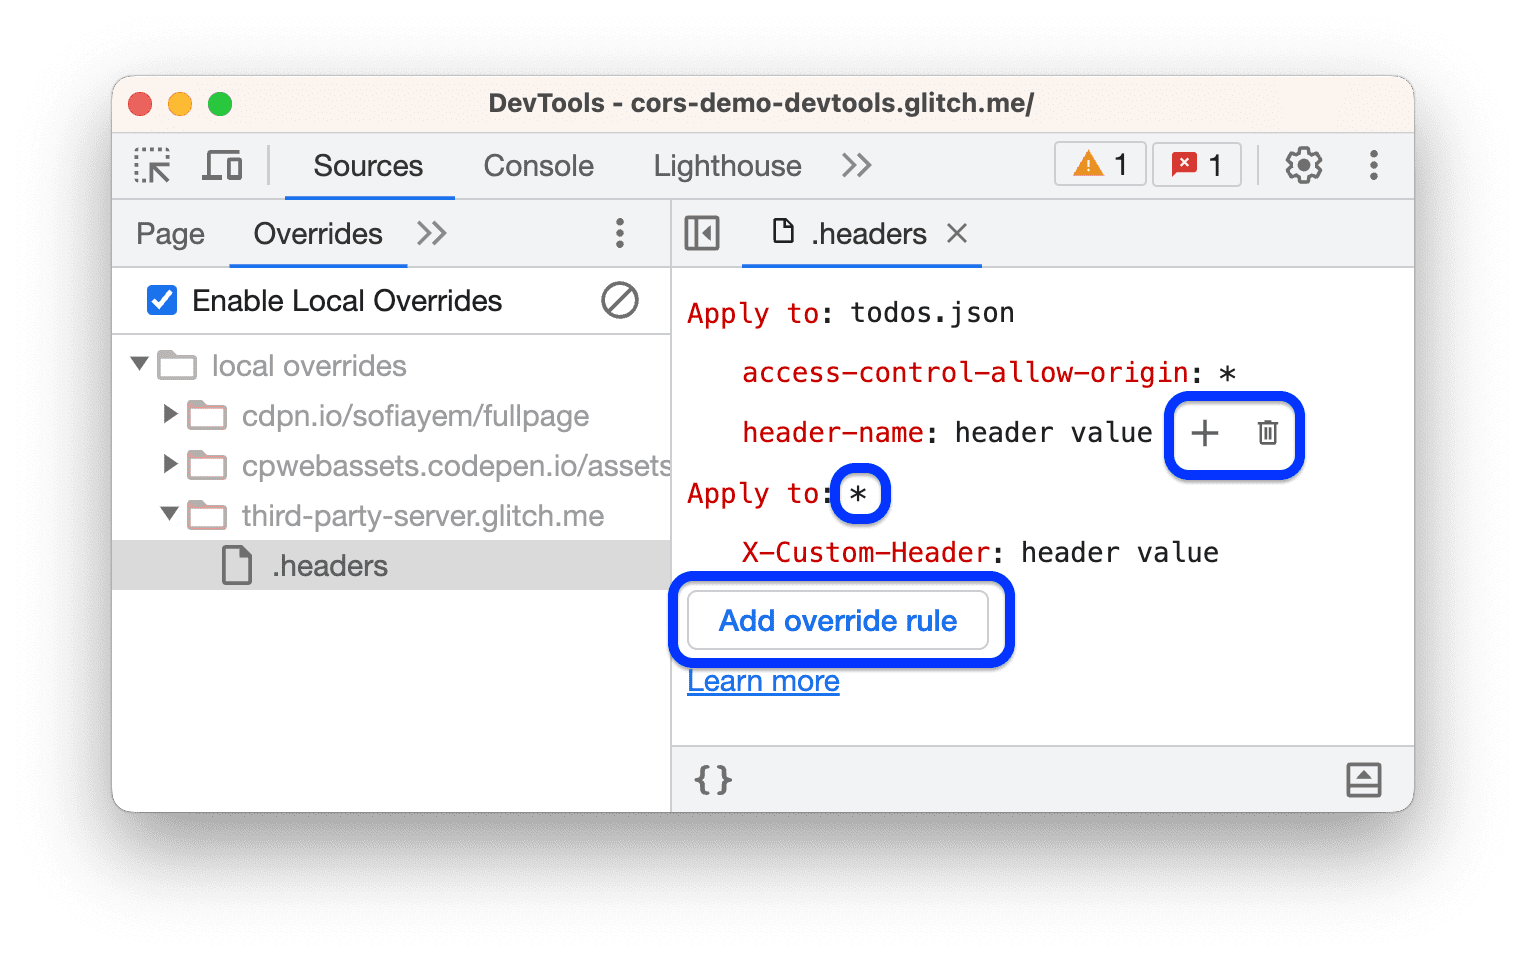
To add a new override rule, click Add override rule. A rule here is a set of headers and values and a single or multiple request to apply them to.
To add a header-value pair to a rule, hover over another pair and click .
To revert a header value, remove an added header or a rule, hover over it and click .
Save the
.headersfile with Command / Control + S.Refresh the page to apply the changes.