

Chrome 66 允許網頁透過 Presentation API 使用附加的次要螢幕,並透過 Presentation Receiver API 控制其內容。
背景
在此之前,網頁開發人員可以建立使用者在 Chrome 中看到的內容與在遠端螢幕上看到的內容不同的體驗,同時仍可在本機控制該體驗。例如在電視上播放影片時,透過 youtube.com 管理播放佇列,或是在 Hangout 工作階段中以全螢幕模式顯示簡報時,在筆電上查看含有講者筆記的幻燈片。
不過,在某些情況下,使用者可能只想將內容呈現在第二個已連結的螢幕上。舉例來說,假設使用者在會議室中使用投影機,並透過 HDMI 傳輸線連接至投影機。使用者其實想在投影機上以全螢幕模式呈現簡報,而不是將簡報鏡像輸出至遠端端點,這樣他們就能在筆電螢幕上使用講者筆記和簡報控制項。雖然網站作者可以以非常簡單的方式支援這項功能 (例如彈出新視窗,使用者必須手動將其拖曳至次要螢幕並將視窗放大至全螢幕),但這項操作相當繁瑣,而且在本機和遠端簡報之間提供的體驗不一致。
呈現頁面
讓我逐步說明如何使用Presentation API,在已連結的次要螢幕上顯示網頁。最終結果請見 https://googlechrome.github.io/samples/presentation-api/。
首先,我們會建立新的 PresentationRequest 物件,其中包含要在附加的次要螢幕上顯示的網址。
const presentationRequest = new PresentationRequest('receiver.html');

In this article, I won’t cover use cases where the parameter passed to
`PresentationRequest` can be an array like `['cast://foo’, 'apple://foo',
'https://example.com']` as this is not relevant there.

We can now monitor presentation display availability and toggle a "Present"
button visibility based on presentation displays availability. Note that we can
also decide to always show this button.

<aside class="caution"><b>Caution:</b> The browser may use more energy while the <code>availability</code> object is alive
and actively listening for presentation display availability changes. Please
use it with caution in order to save energy on mobile.</aside>

```js
presentationRequest.getAvailability()
  .then(availability => {
    console.log('Available presentation displays: ' + availability.value);
    availability.addEventListener('change', function() {
      console.log('> Available presentation displays: ' + availability.value);
    });
  })
  .catch(error => {
    console.log('Presentation availability not supported, ' + error.name + ': ' +
        error.message);
  });
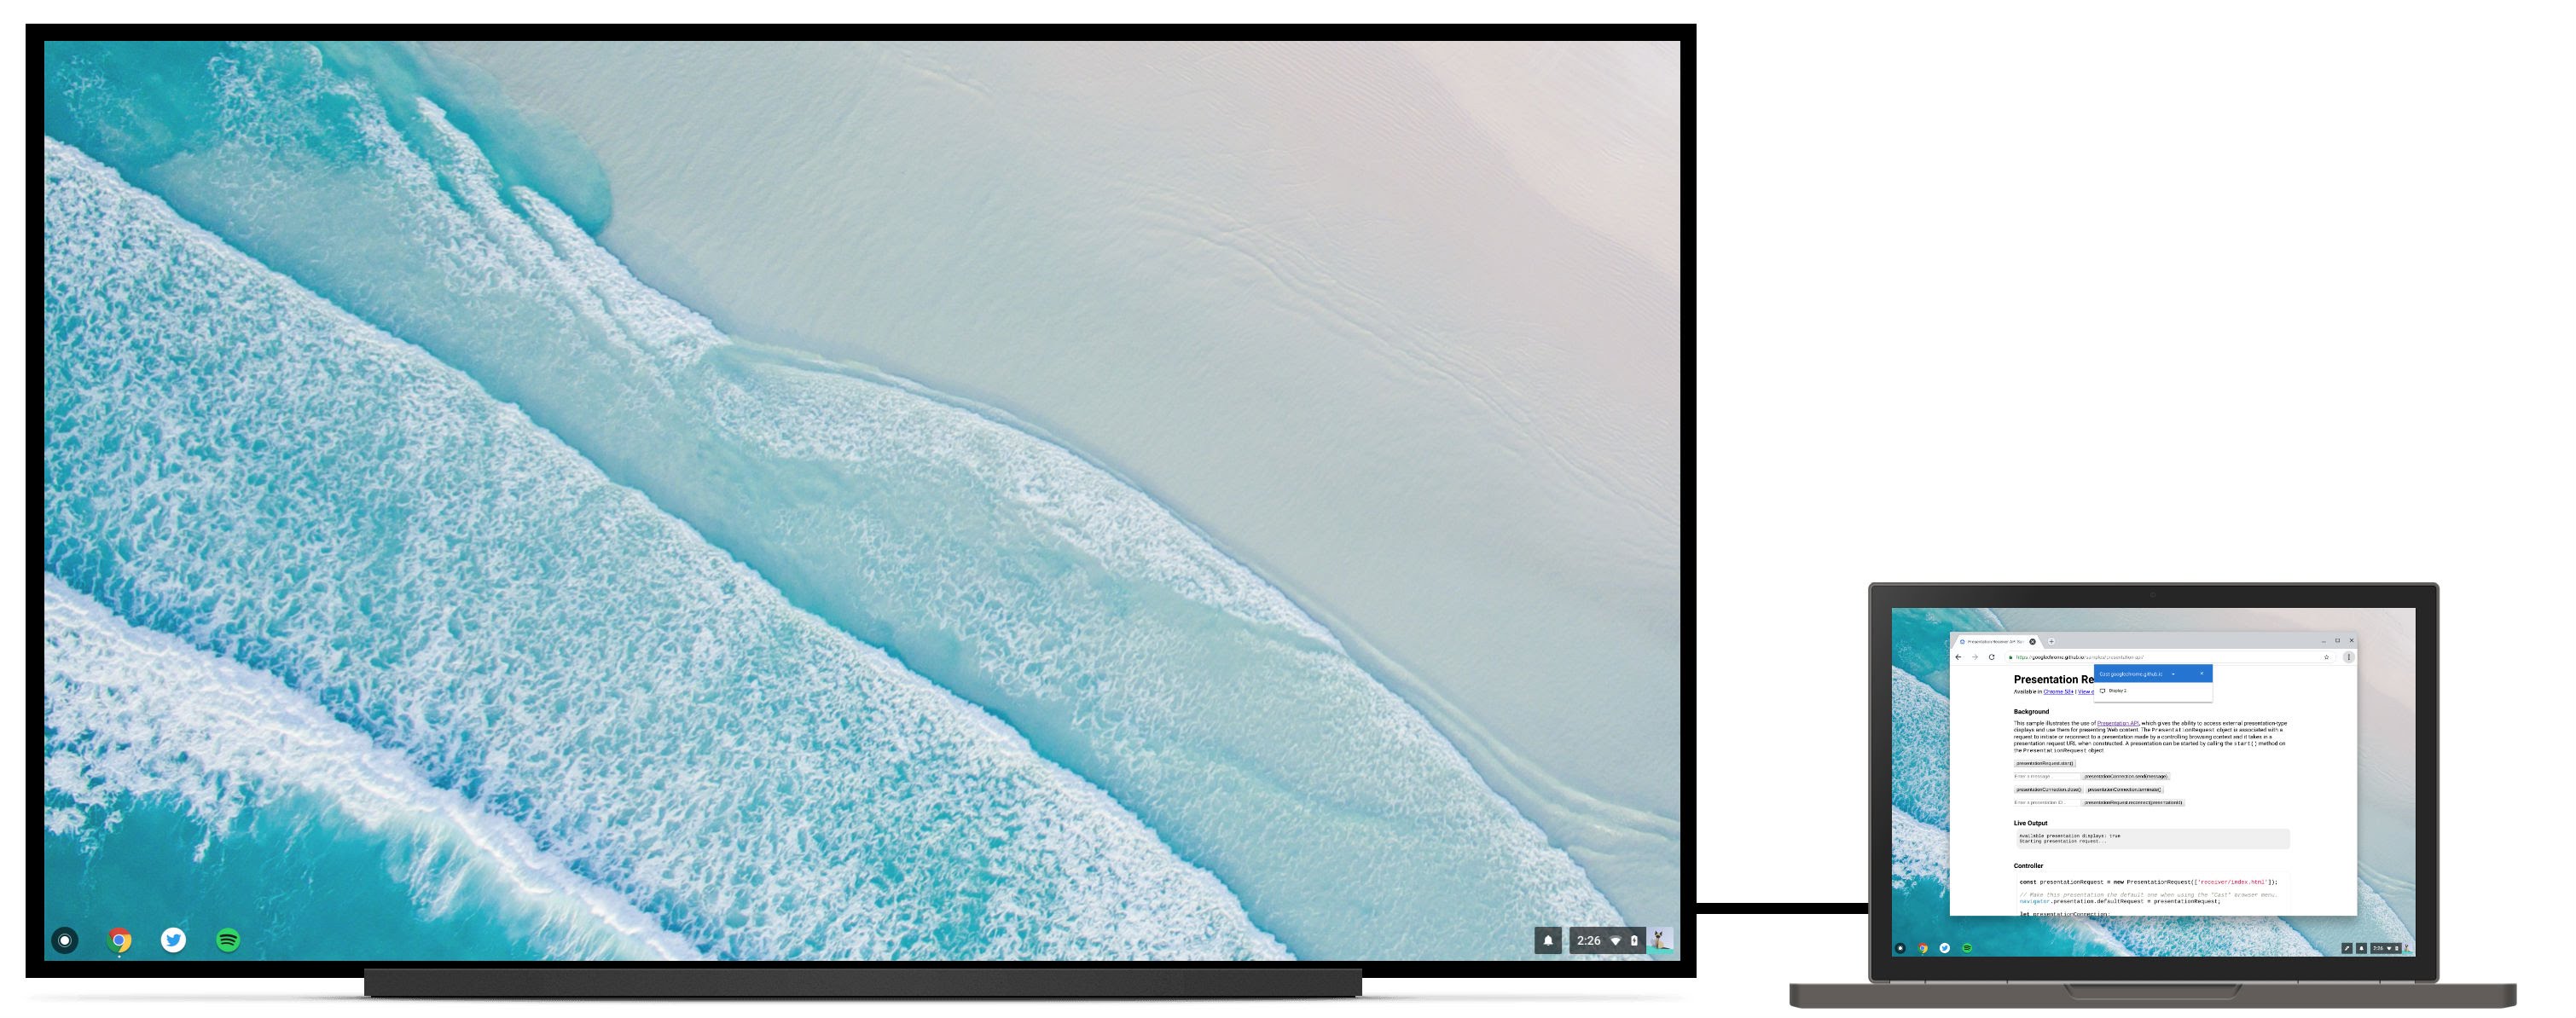
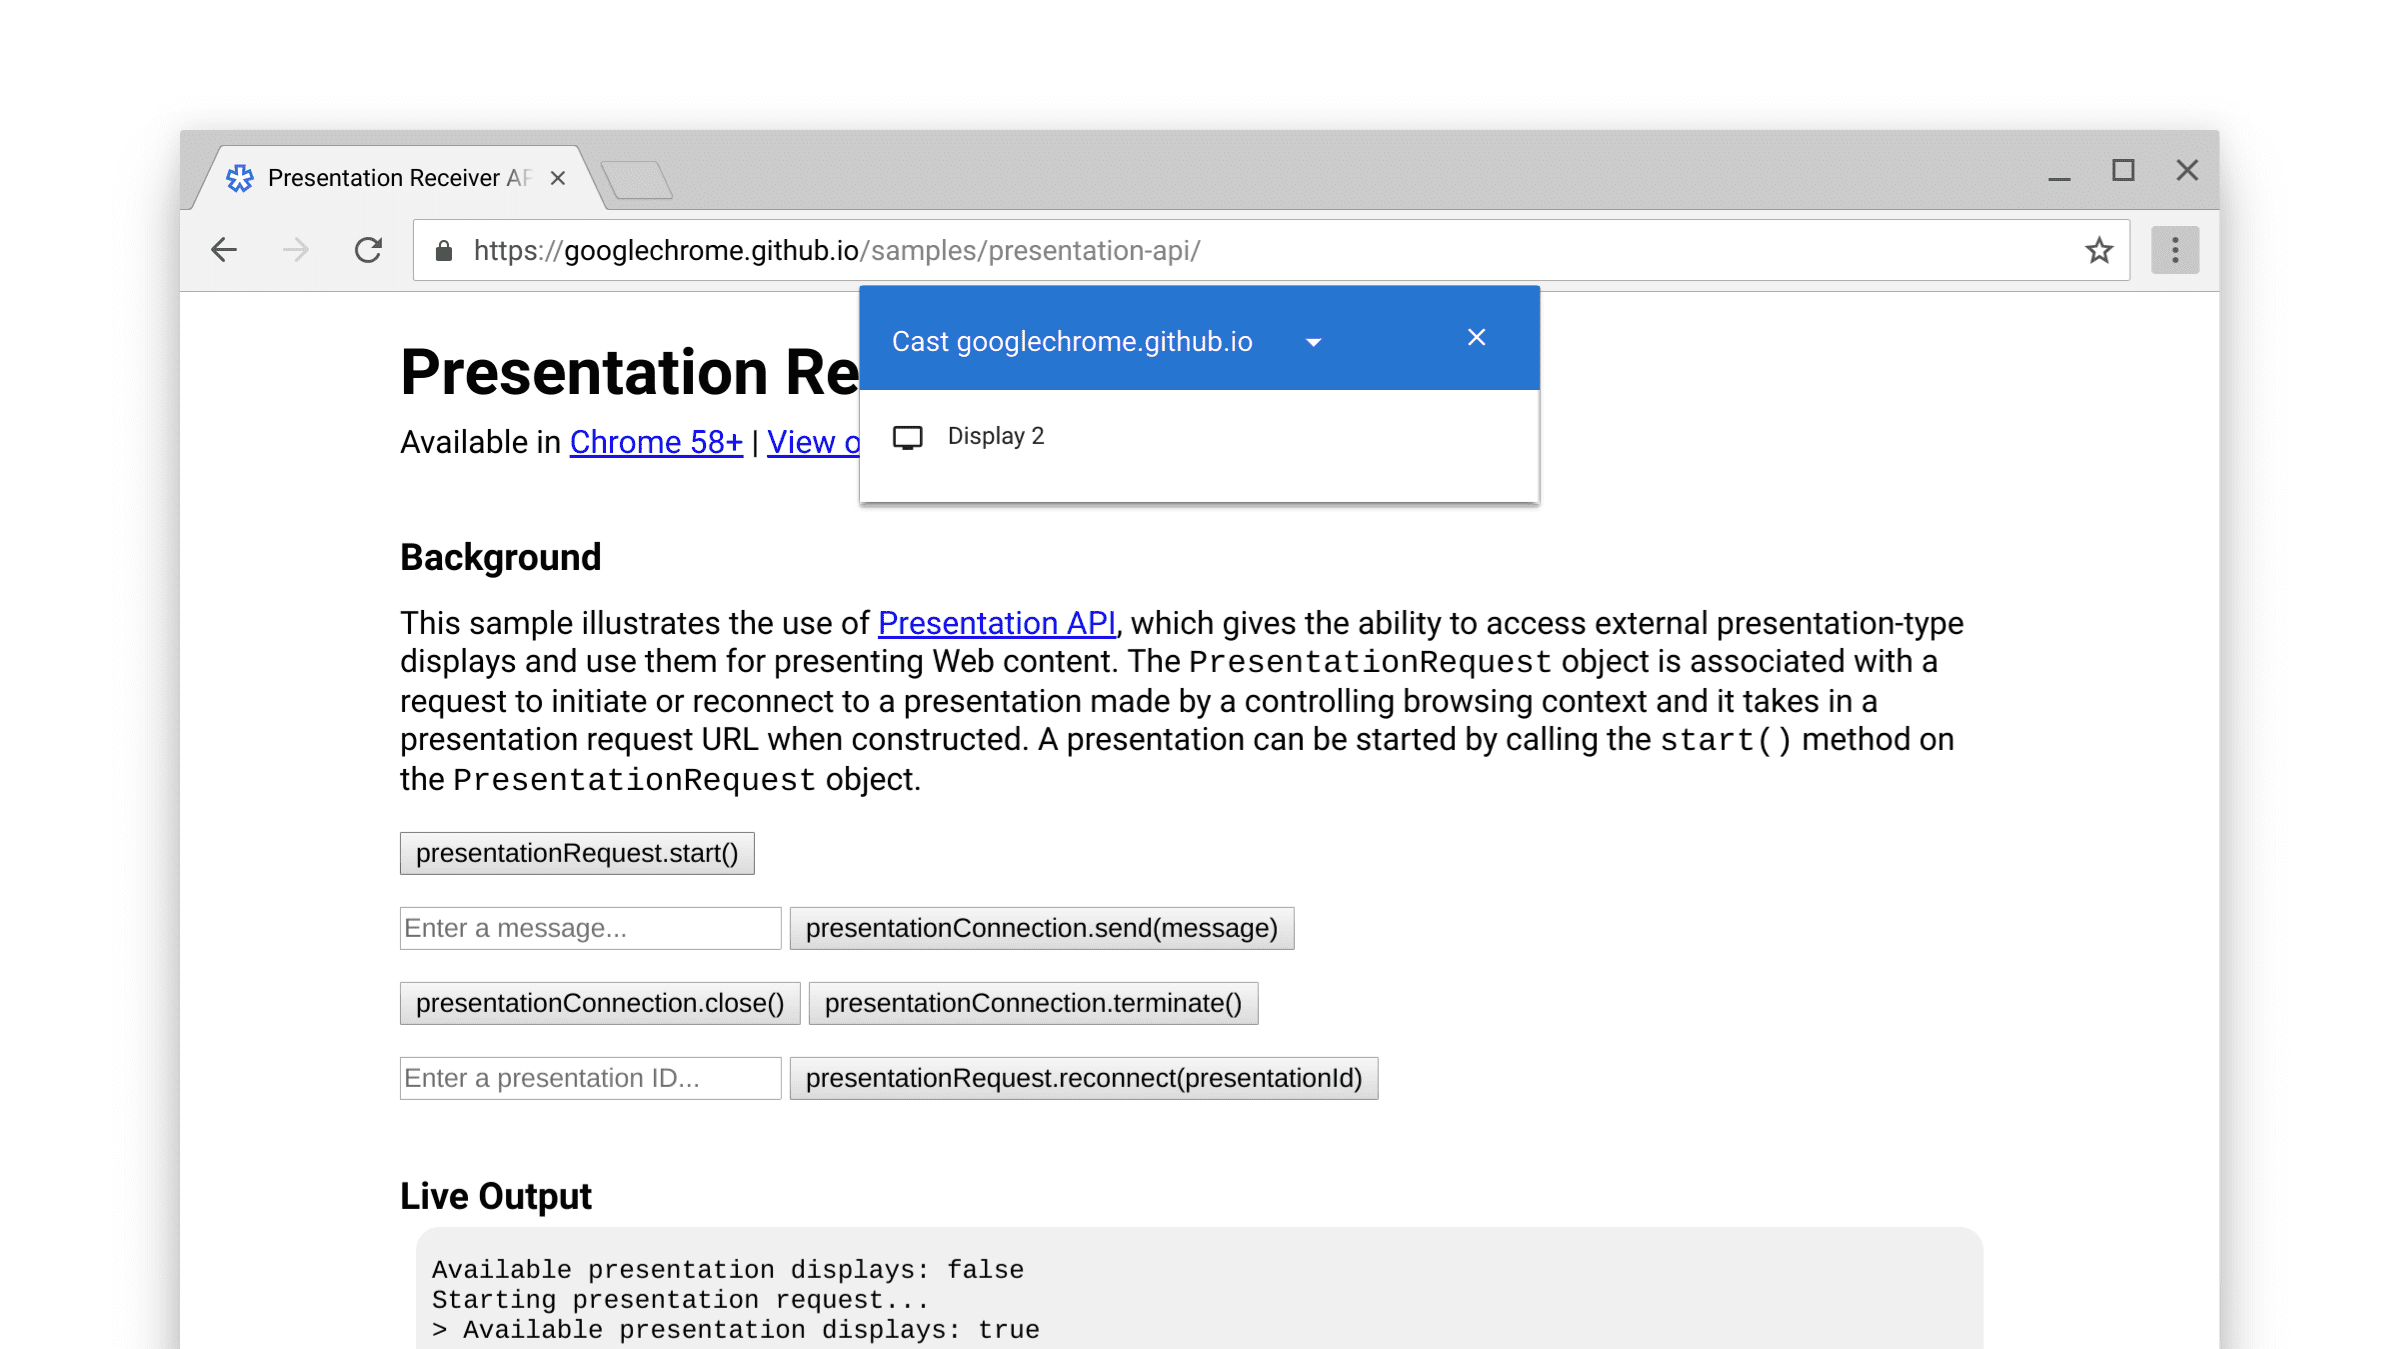
您必須透過使用者手勢 (例如點選按鈕),才能顯示簡報顯示提示。因此,我們會在按下按鈕時呼叫 presentationRequest.start(),並在使用者選取要呈現的螢幕 (例如我們用例中的次要附加螢幕) 後,等待承諾解析。
function onPresentButtonClick() {
  presentationRequest.start()
  .then(connection => {
    console.log('Connected to ' + connection.url + ', id: ' + connection.id);
  })
  .catch(error => {
    console.log(error);
  });
}
如果您連結到廣告網路,系統可能會向使用者顯示 Chromecast 裝置等遠端端點。請注意,鏡像螢幕不在清單中。請參閱 http://crbug.com/840466。
當應許承諾解析時,系統會將 PresentationRequest 物件網址中的網頁呈現給所選顯示裝置。瞧!
我們現在可以進一步監控「關閉」和「終止」事件,如下所示。請注意,您可以使用 presentationRequest.reconnect(presentationId) 重新連線至「已關閉」的 presentationConnection,其中 presentationId 是先前 presentationRequest 物件的 ID。
function onCloseButtonClick() {
  // Disconnect presentation connection but will allow reconnection.
  presentationConnection.close();
}

presentationConnection.addEventListener('close', function() {
  console.log('Connection closed.');
});


function onTerminateButtonClick() {
  // Stop presentation connection for good.
  presentationConnection.terminate();
}

presentationConnection.addEventListener('terminate', function() {
  console.log('Connection terminated.');
});
與頁面通訊
您可能會想,這很棒,但我該如何在控制器頁面 (我們剛才建立的頁面) 和接收器頁面 (我們傳遞至 PresentationRequest 物件的頁面) 之間傳遞訊息?
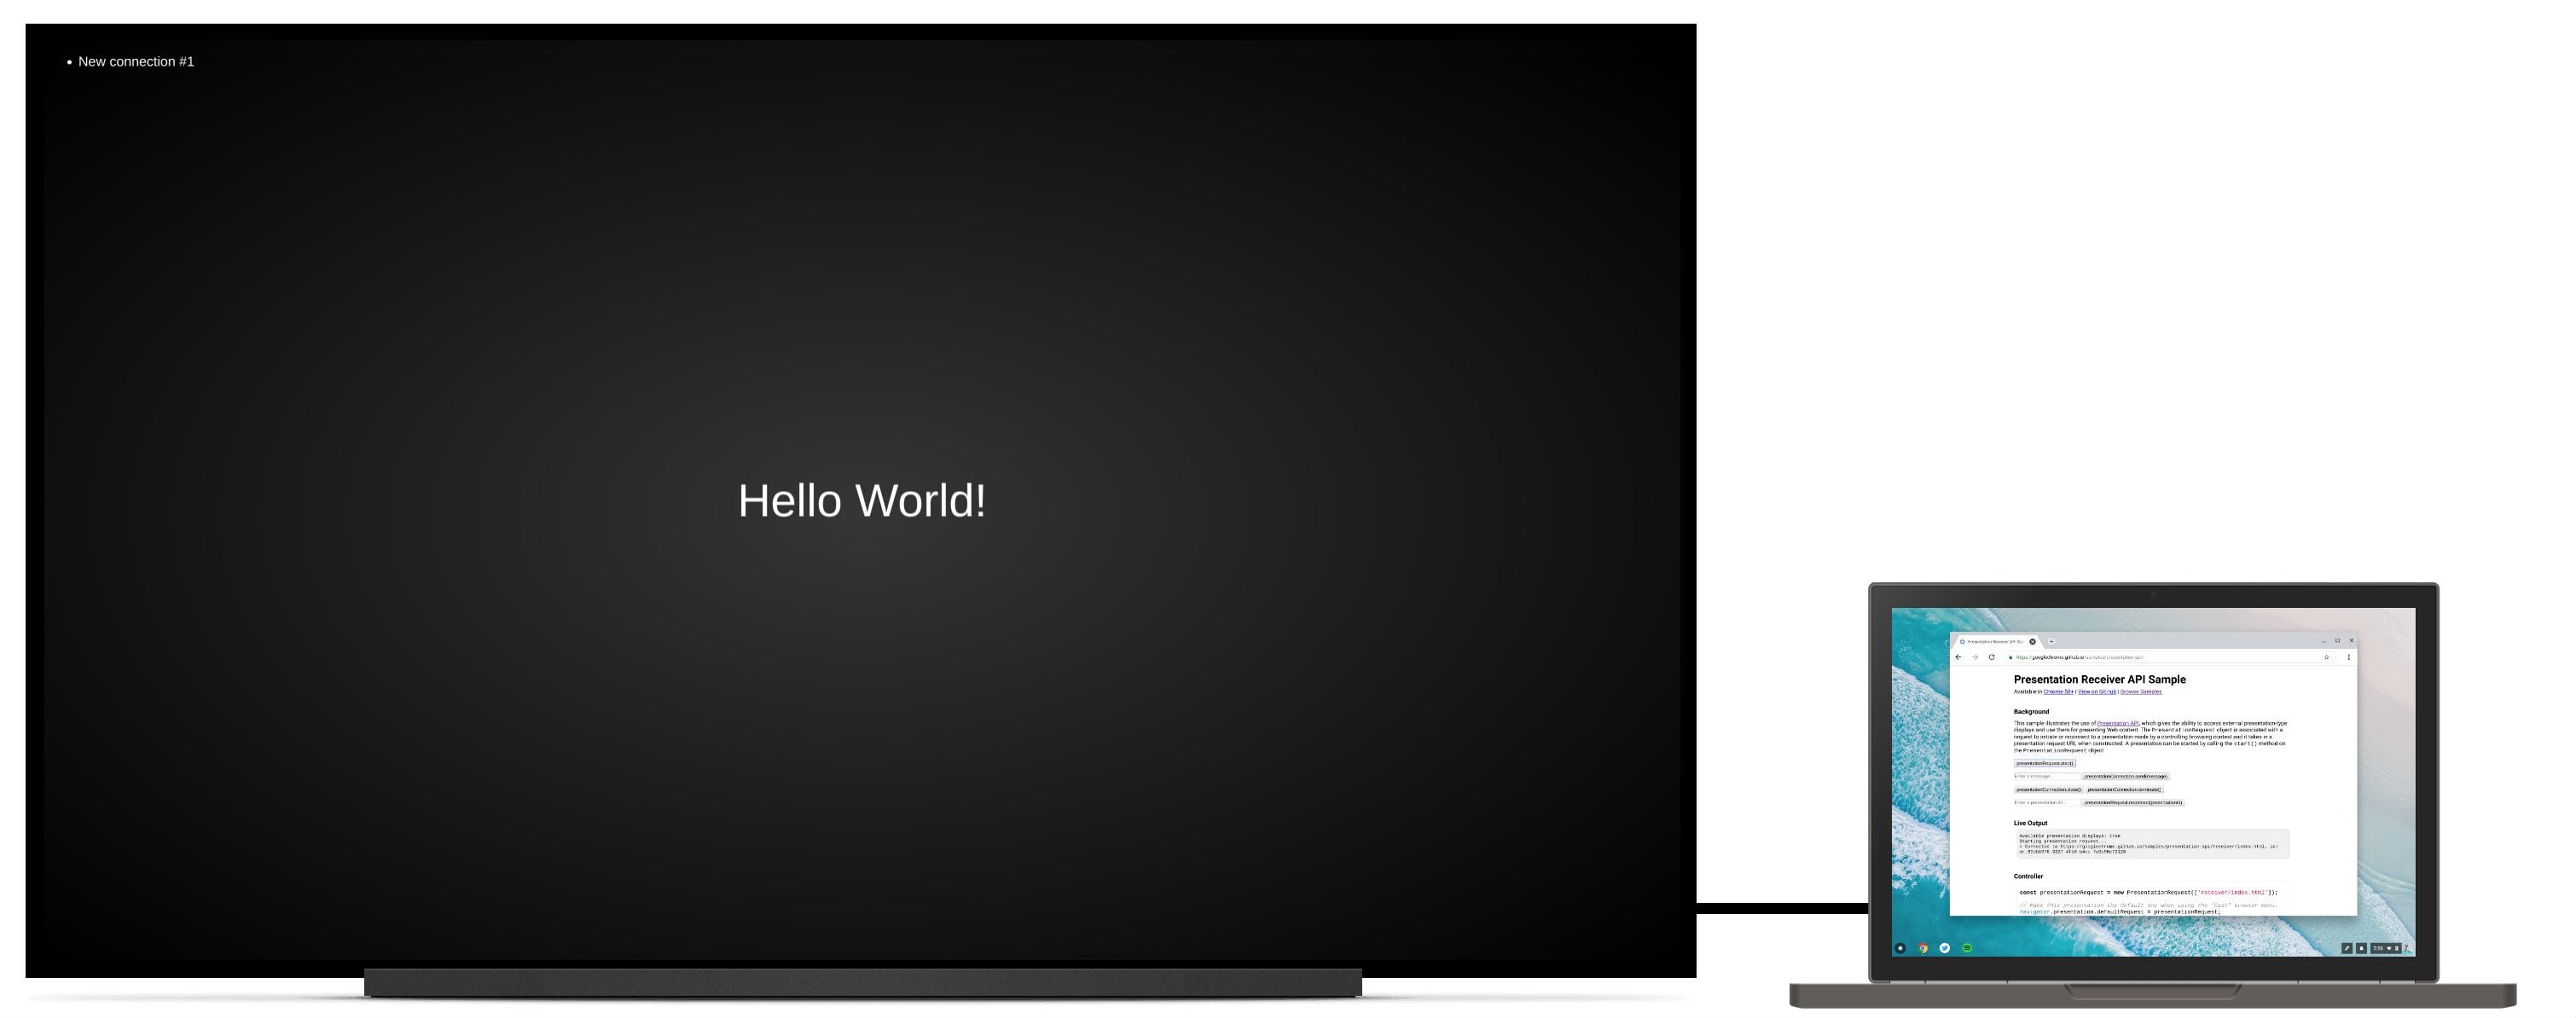
首先,我們將使用 navigator.presentation.receiver.connectionList 在接收端頁面上擷取現有的連線,並監聽傳入的連線,如下所示。
// Receiver page

navigator.presentation.receiver.connectionList
.then(list => {
  list.connections.map(connection => addConnection(connection));
  list.addEventListener('connectionavailable', function(event) {
    addConnection(event.connection);
  });
});

function addConnection(connection) {

  connection.addEventListener('message', function(event) {
    console.log('Message: ' + event.data);
    connection.send('Hey controller! I just received a message.');
  });

  connection.addEventListener('close', function(event) {
    console.log('Connection closed!', event.reason);
  });
}
接收訊息的連線會觸發您可以監聽的「message」事件。訊息可以是字串、Blob、ArrayBuffer 或 ArrayBufferView。傳送這項資訊的方式非常簡單,只要從控制器頁面或接收器頁面呼叫 connection.send(message) 即可。
// Controller page

function onSendMessageButtonClick() {
  presentationConnection.send('Hello!');
}

presentationConnection.addEventListener('message', function(event) {
  console.log('I just received ' + event.data + ' from the receiver.');
});
請前往 https://googlechrome.github.io/samples/presentation-api/ 試用範例,瞭解這項功能的運作方式。我相信你一定會和我一樣喜歡這款應用程式。
範例和試用版
請查看我們在本文中使用的官方 Chrome 範例。
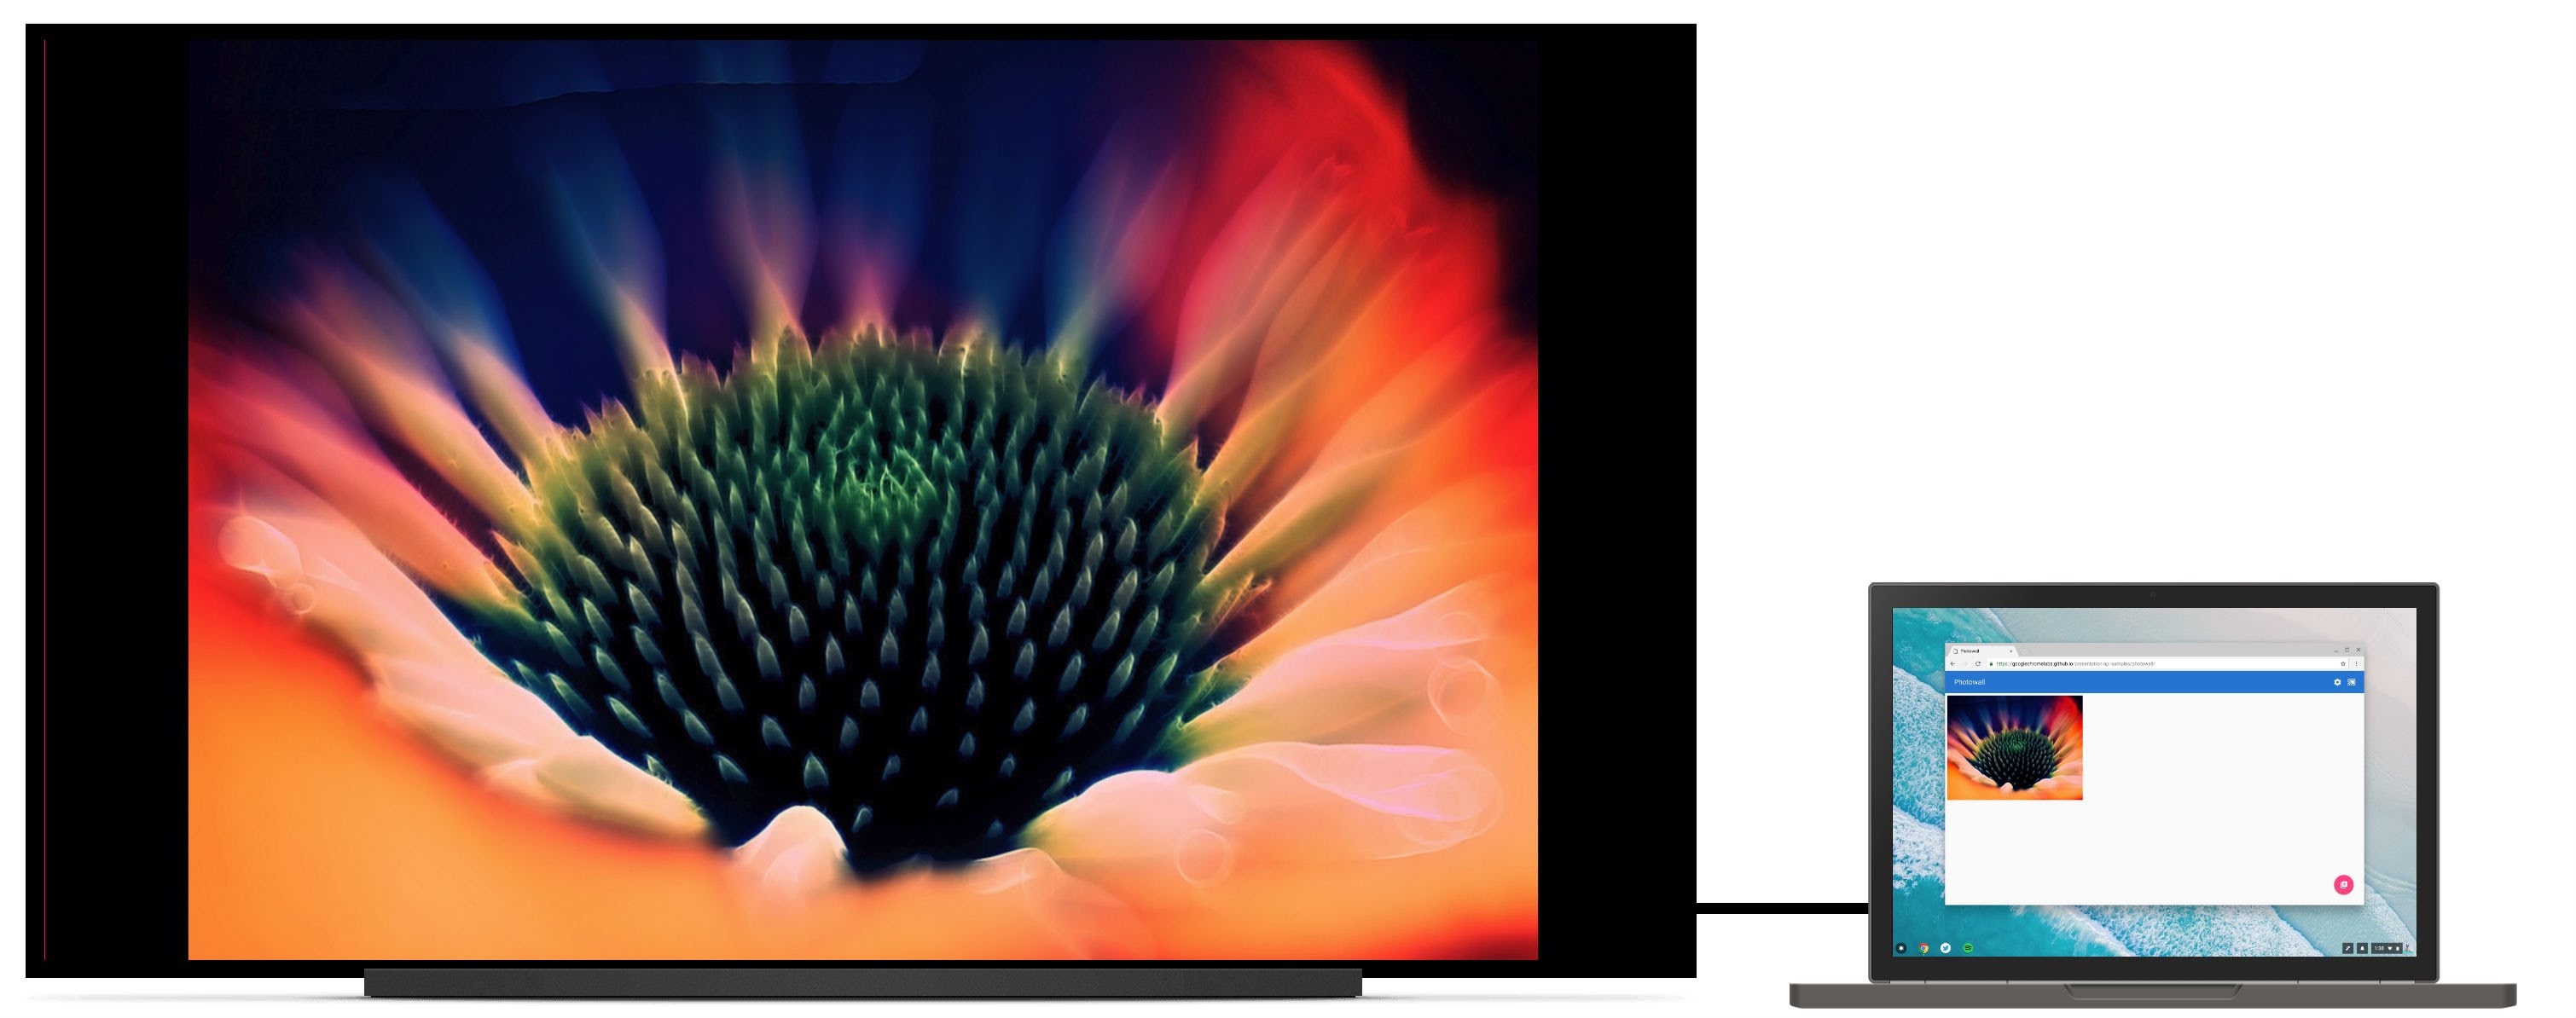
我也會推薦互動式相片牆試用版。這個網頁應用程式可讓多個控制器在簡報螢幕上共同呈現相片投影播放內容。您可以在 https://github.com/GoogleChromeLabs/presentation-api-samples 取得程式碼。
額外消息
Chrome 提供「投放」瀏覽器選單,使用者可在瀏覽網站時隨時叫用。如要控管這個選單的預設呈現方式,請將 navigator.presentation.defaultRequest 指派給先前建立的自訂 presentationRequest 物件。
// Make this presentation the default one when using the "Cast" browser menu.
navigator.presentation.defaultRequest = presentationRequest;
開發人員提示
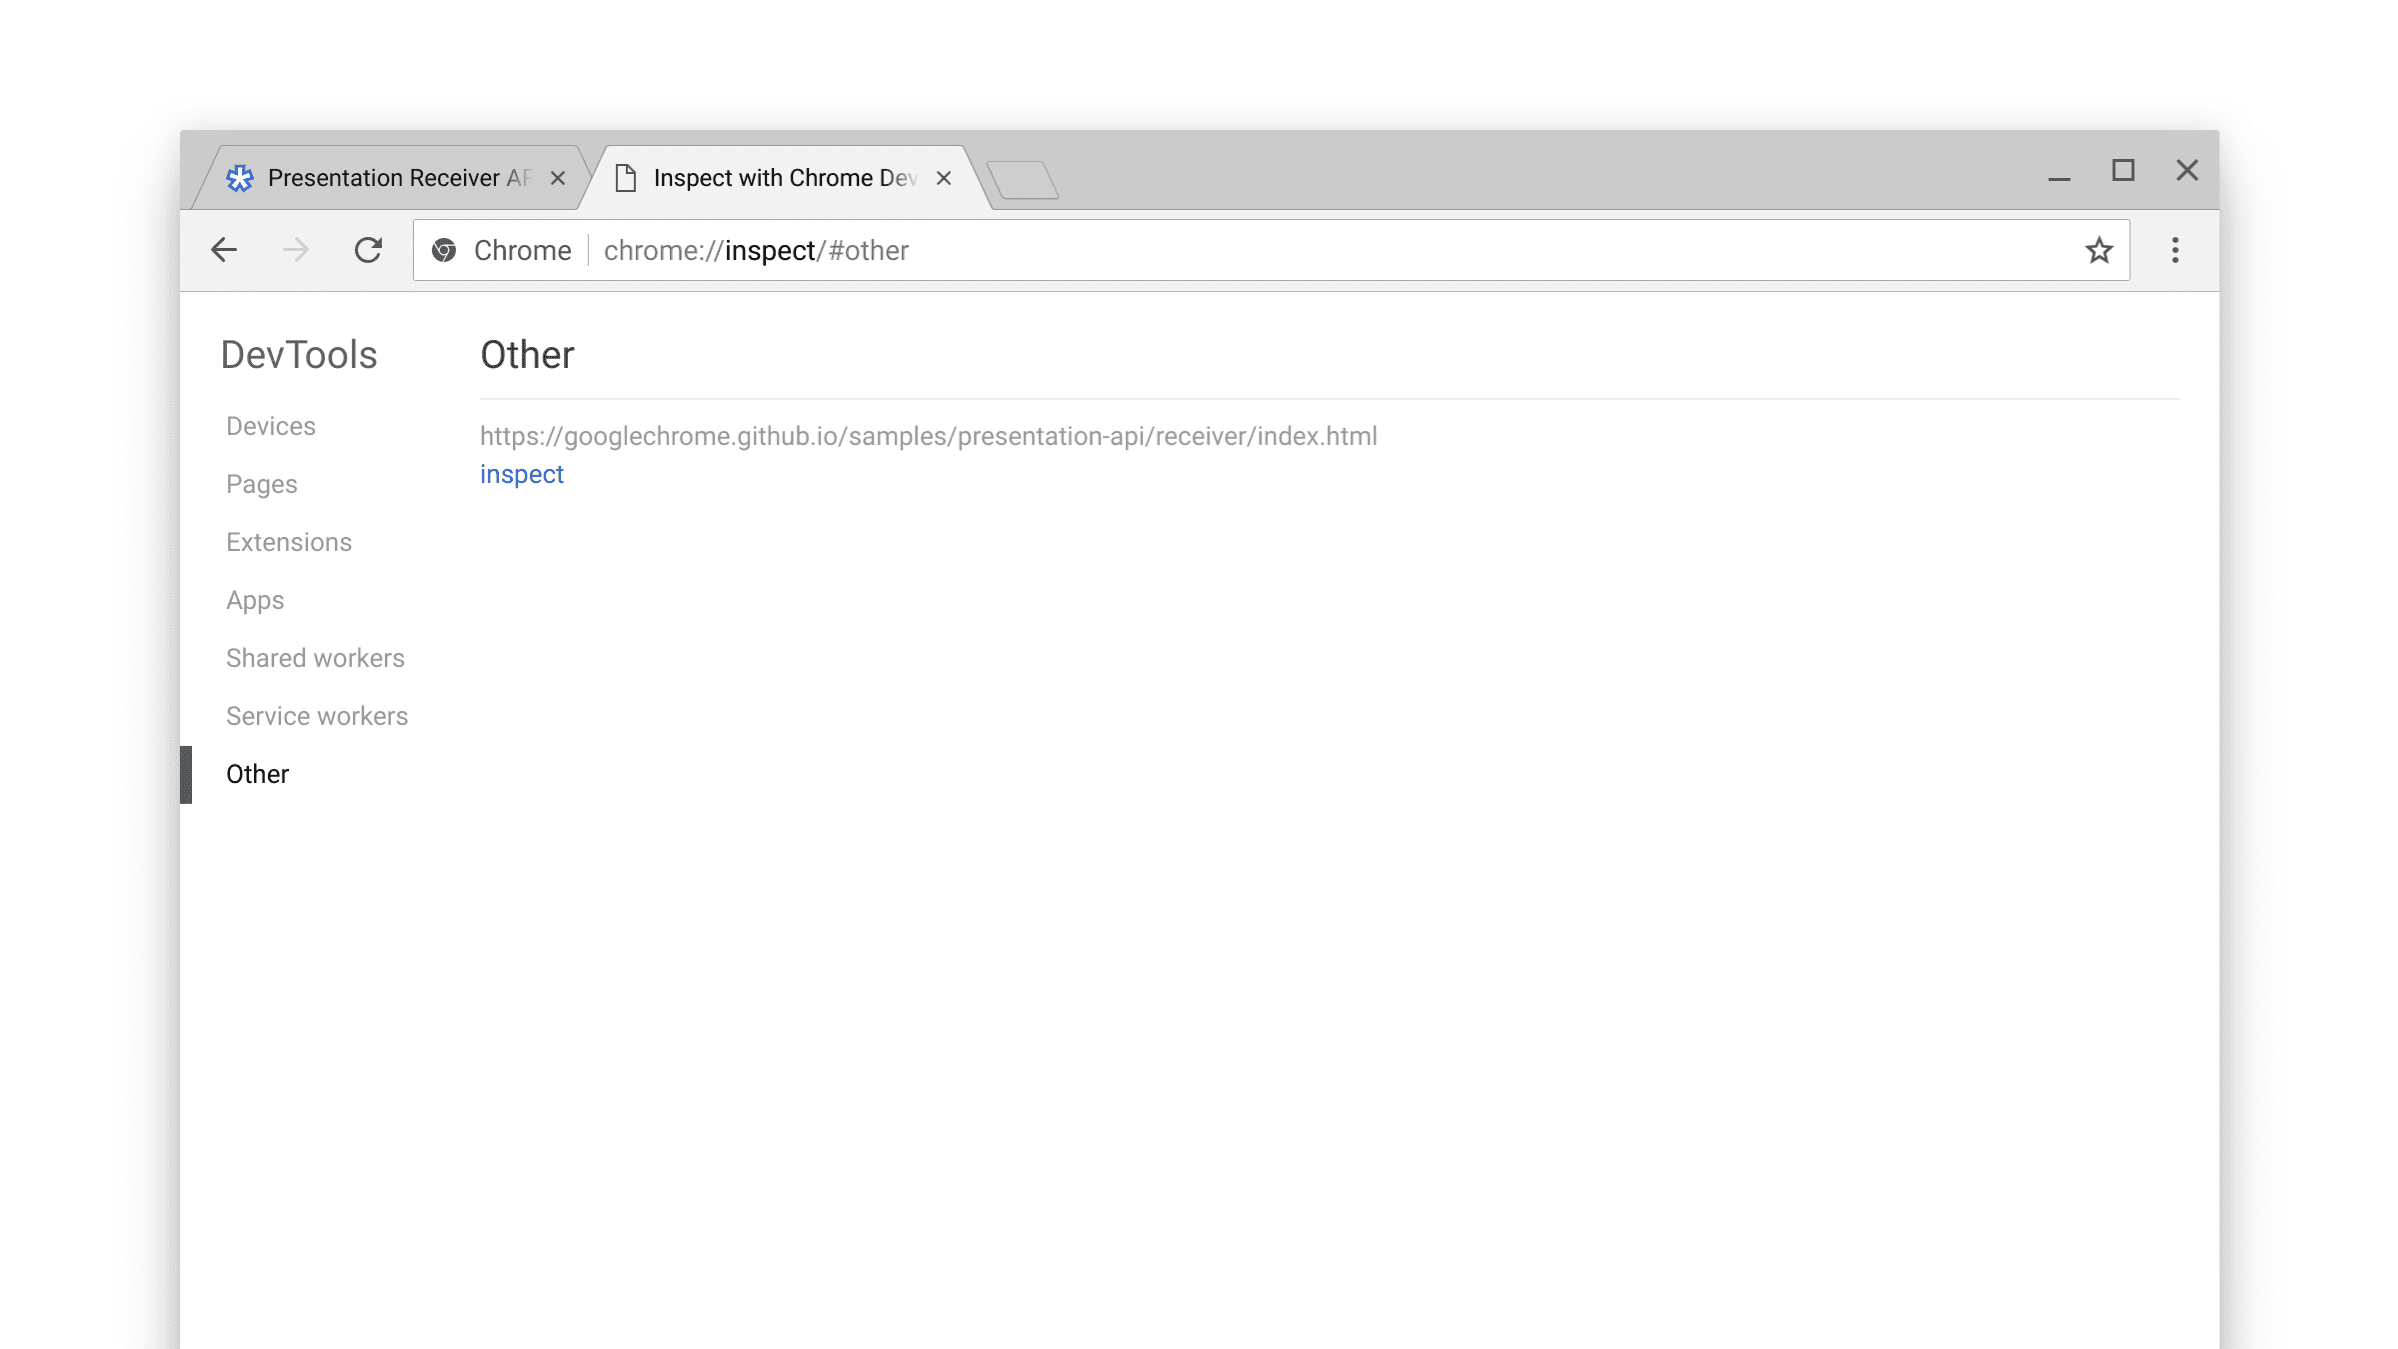
如要檢查接收器頁面並進行偵錯,請前往內部 chrome://inspect 頁面,選取「其他」,然後按一下目前顯示網址旁的「檢查」連結。
您也可以查看內部 chrome://media-router-internals 頁面,深入瞭解內部探索/可用性程序。
後續步驟
自 Chrome 66 起,ChromeOS、Linux 和 Windows 平台皆已支援。我們會在日後推出 Mac 支援功能。