

इस गाइड में, कस्टम टैब में कस्टम इंटरैक्टिविटी जोड़ने का तरीका बताया गया है.
शेयर करने की डिफ़ॉल्ट कार्रवाई चालू करना
अगर आपने शेयर करने के लिए कोई कस्टम ऐक्शन नहीं दिया है, तो ओवरफ़्लो मेन्यू में ब्राउज़र का डिफ़ॉल्ट शेयर ऐक्शन चालू करना अच्छा रहेगा. इससे, उपयोगकर्ताओं को देखे जा रहे कॉन्टेंट का लिंक शेयर करने में आसानी होगी:
    CustomTabsIntent.Builder intentBuilder = new CustomTabsIntent.Builder();
    intentBuilder.setShareState(CustomTabsIntent.SHARE_STATE_ON);
कस्टम ऐक्शन बटन जोड़ना
ज़रूरी कार्रवाइयों के लिए, कस्टम टैब टूलबार की मदद से, कस्टम ऐक्शन बटन इंटिग्रेट किया जा सकता है. इस बटन में टेक्स्ट लेबल या कस्टम आइकॉन हो सकता है. आइकॉन की ऊंचाई 24 डीपी और चौड़ाई 24 से 48 डीपी होनी चाहिए.
उदाहरण के लिए, टूलबार में शेयर करने की कस्टम कार्रवाई जोड़ी जा सकती है. ऐसा करने के लिए, एक BroadcastReceiver बनाएं. यह तब ट्रिगर होगा, जब उपयोगकर्ता कस्टम टैब में 'शेयर करें' ऐक्शन पर क्लिक करेगा.
AndroidManifest.xml फ़ाइल में BroadCastReceiver को रजिस्टर करें:
<application …>
  <receiver android:name=".ShareBroadcastReceiver" />
</application>
इसके बाद, ShareBroadcastReceiver नाम की नई क्लास जोड़ें. onReceive() तरीके में, इंटेंट से फ़िलहाल दिखाया जा रहा यूआरएल निकालें और भेजने का इंटेंट ट्रिगर करें.
public class ShareBroadcastReceiver extends BroadcastReceiver {

    @Override
    public void onReceive(Context context, Intent intent) {
        String url = intent.getDataString();
        Intent sendIntent = new Intent();
        sendIntent.setAction(Intent.ACTION_SEND);
        sendIntent.putExtra(Intent.EXTRA_TEXT, url);
        sendIntent.setType("text/plain");
        Intent shareIntent = Intent.createChooser(sendIntent, null);
        shareIntent.setFlags(Intent.FLAG_ACTIVITY_NEW_TASK);
        context.startActivity(shareIntent);
    }
}
अब, ShareBroadcast के लिए PendingIntent बनाएं और उसे setActionButton() के ज़रिए रजिस्टर करें. आइकॉन और ब्यौरे के साथ, पेंडिंग इंटेंट को पास करें.
String shareDescription = getString(R.string.label_action_share);
Bitmap shareIcon = BitmapFactory.decodeResource(getResources(),
       android.R.drawable.ic_menu_share);

// Create a PendingIntent to your BroadCastReceiver implementation
Intent actionIntent = new Intent(
       this.getApplicationContext(), ShareBroadcastReceiver.class);
PendingIntent pendingIntent =
       PendingIntent.getBroadcast(getApplicationContext(), 0 /* request code */, actionIntent, PendingIntent.FLAG_MUTABLE);

//Set the pendingIntent as the action to be performed when the button is clicked.
CustomTabsIntent intentBuilder = new CustomTabsIntent.Builder()
    …
    .setActionButton(shareIcon, shareDescription, pendingIntent)
    .build();
पसंद के मुताबिक मेन्यू आइटम जोड़ना
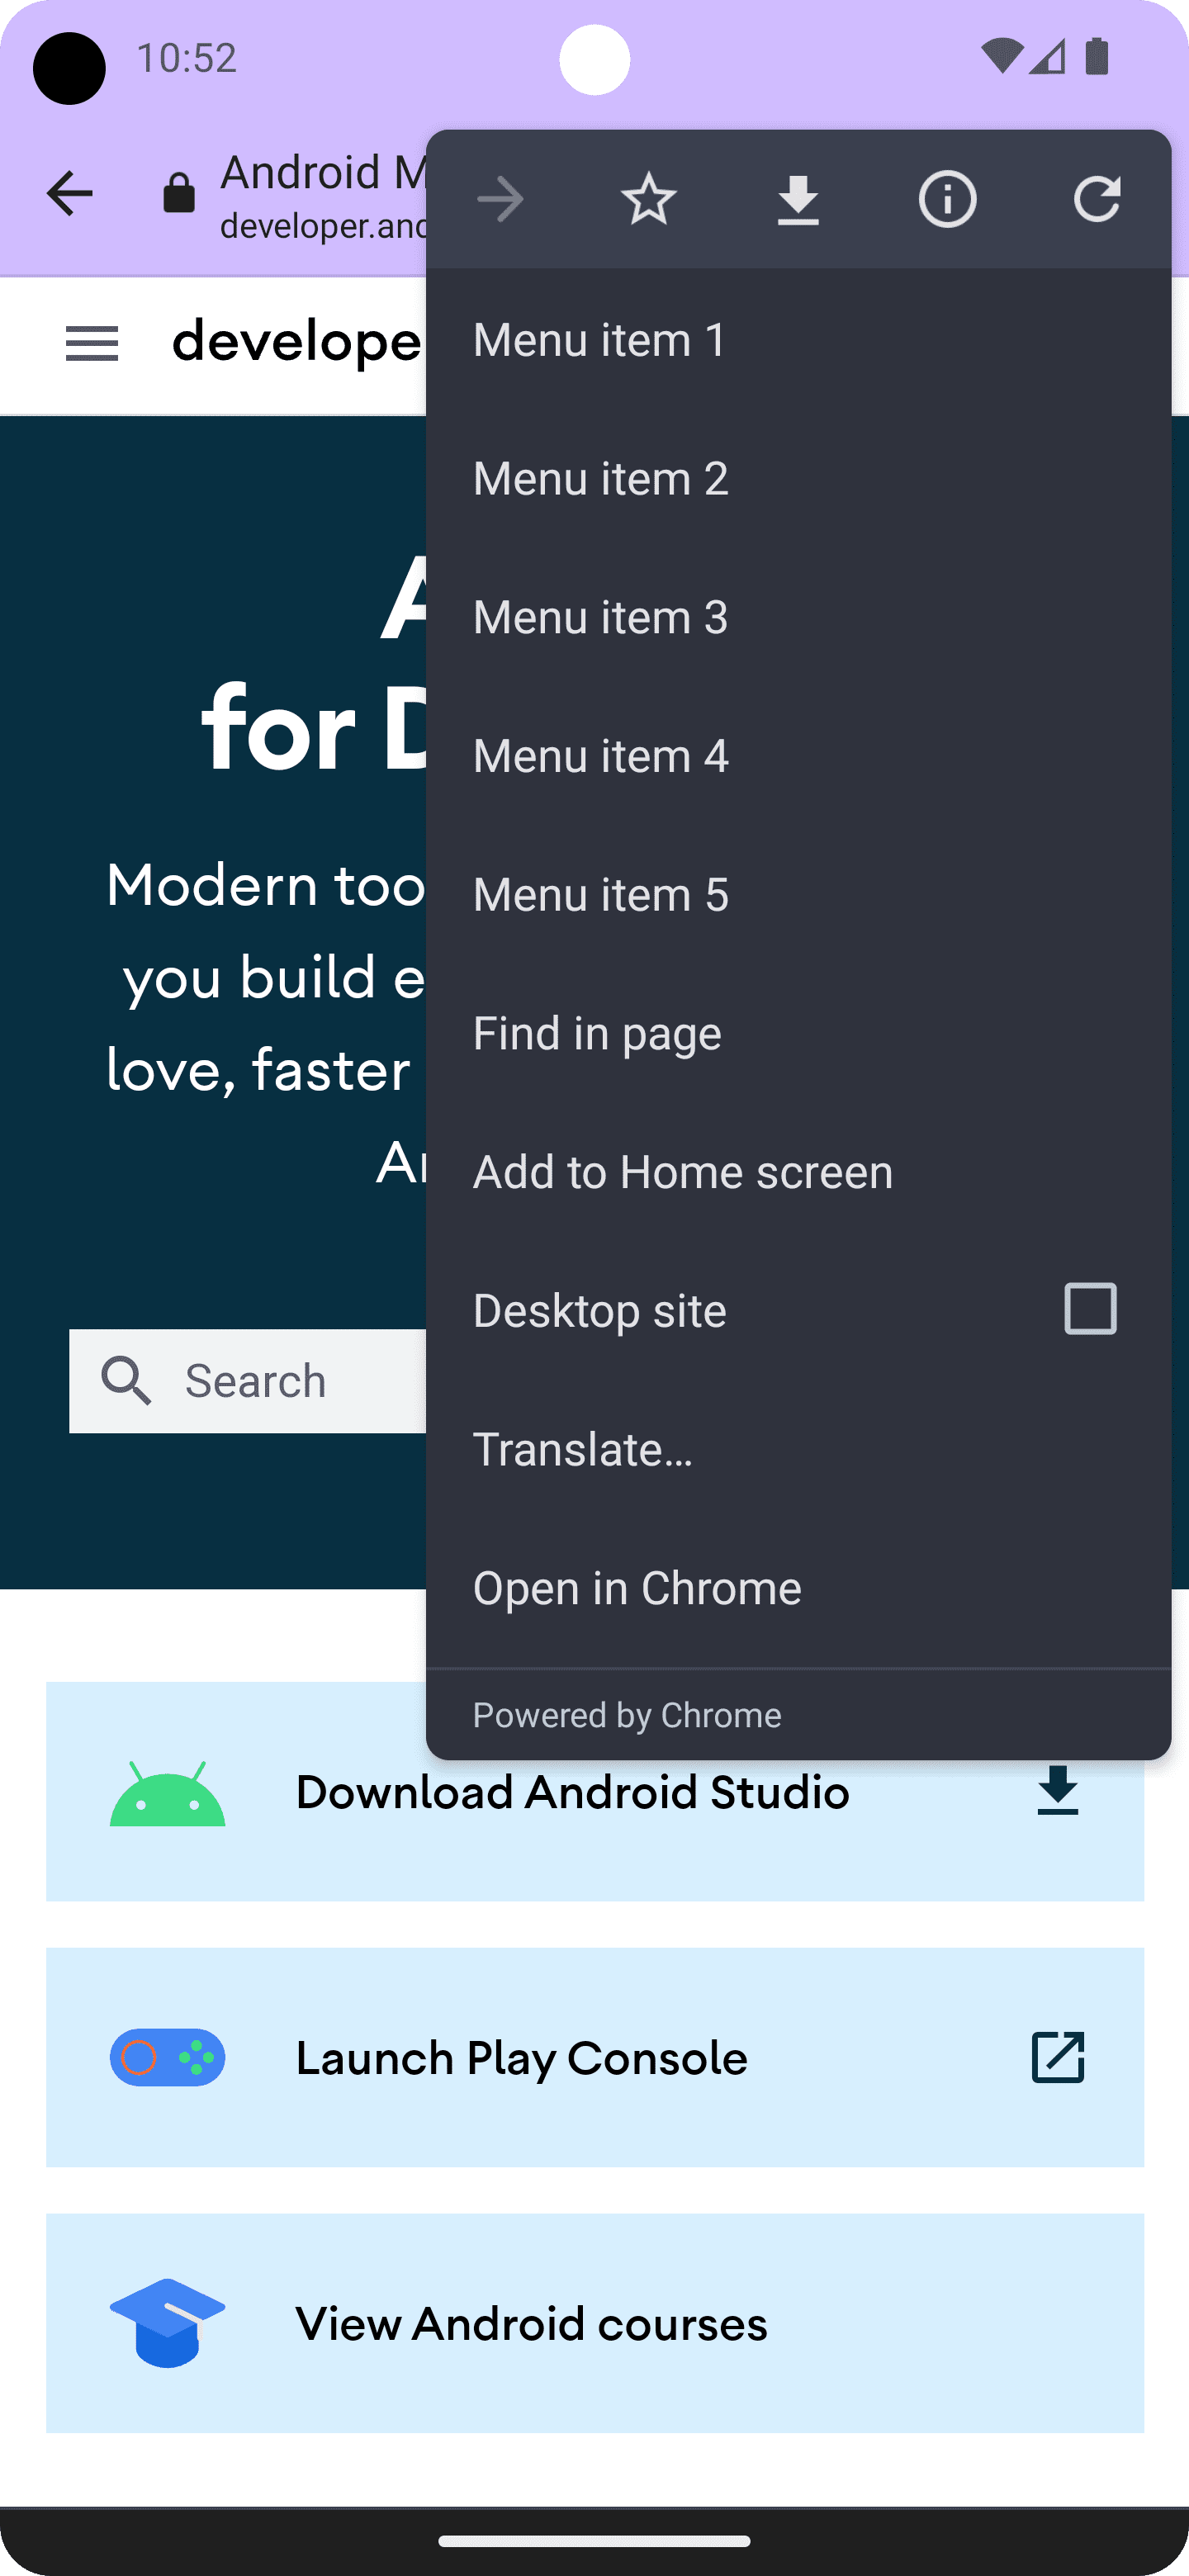
कस्टम टैब में, ब्राउज़र की ओर से पांच डिफ़ॉल्ट कार्रवाइयां उपलब्ध होती हैं: "आगे बढ़ें", "पेज की जानकारी", "रीफ़्रेश करें", "पेज में खोजें", और "ब्राउज़र में खोलें". इसके अलावा, ज़्यादा से ज़्यादा सात और फ़ोटो जोड़ी जा सकती हैं. ये मेन्यू आइटम, आइकॉन की पंक्ति और ब्राउज़र से मिले आइटम के बीच डाले जाएंगे. (नीचे दी गई इमेज देखें.) असल संख्या, ब्राउज़र के लागू होने के तरीके पर निर्भर करती है. (उदाहरण के लिए, Chrome के 117 वर्शन में मेन्यू आइटम की संख्या पांच से बढ़ाकर सात कर दी गई थी.) इसलिए, सबसे ज़रूरी आइटम पहले जोड़ें.
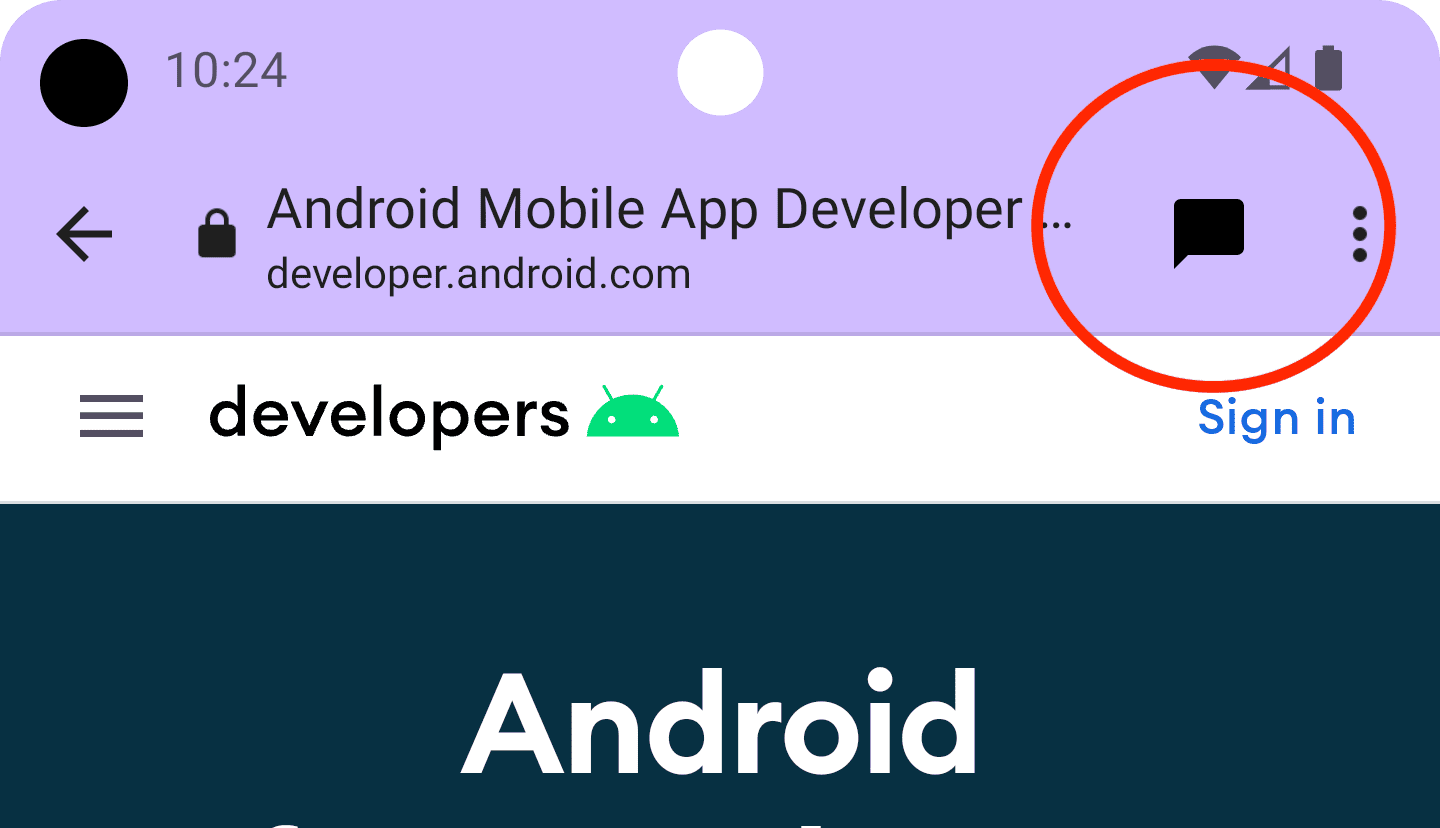
अपनी पसंद के मुताबिक बनाई गई कार्रवाइयों को ऐक्सेस करने के लिए, सबसे ऊपर दाएं कोने में मौजूद तीन बिंदु वाले मेन्यू का इस्तेमाल करें:
मेन्यू में आइटम जोड़ने के लिए, टाइटल और PendingIntent के साथ CustomTabsIntent.Builder.addMenuItem() को कॉल करें. जब उपयोगकर्ता किसी मेन्यू आइटम पर टैप करता है, तो ब्राउज़र PendingIntent को ट्रिगर करेगा.
CustomTabsIntent intent = new CustomTabsIntent.Builder()
        ...
        .addMenuItem("Menu item 1", pendingIntent)
        .addMenuItem("Menu item 2", pendingIntent)
        .addMenuItem("Menu item 3", pendingIntent)
        .addMenuItem("Menu item 4", pendingIntent)
        .addMenuItem("Menu item 5", pendingIntent)
        .build();
'बंद करें' बटन को पसंद के मुताबिक बनाना
कस्टम टैब को अपने ऐप्लिकेशन के फ़्लो में बेहतर तरीके से फ़िट करने के लिए, बंद करने के बटन को पसंद के मुताबिक बनाएं. अगर आपको उपयोगकर्ता को यह महसूस कराना है कि कस्टम टैब एक मॉडल डायलॉग है, तो डिफ़ॉल्ट “X” बटन का इस्तेमाल करें. अगर आपको उपयोगकर्ता को यह महसूस कराना है कि कस्टम टैब, ऐप्लिकेशन फ़्लो का हिस्सा है, तो बैक ऐरो का इस्तेमाल करें.
CustomTabsIntent.Builder intentBuilder = new CustomTabsIntent.Builder();
intentBuilder.setCloseButtonIcon(BitmapFactory.decodeResource(
    getResources(), R.drawable.ic_arrow_back));
नीचे टूलबार जोड़ना
सबसे नीचे मौजूद टूलबार, कस्टम टैब में ज़्यादा फ़ंक्शन जोड़ने का एक आसान तरीका है.
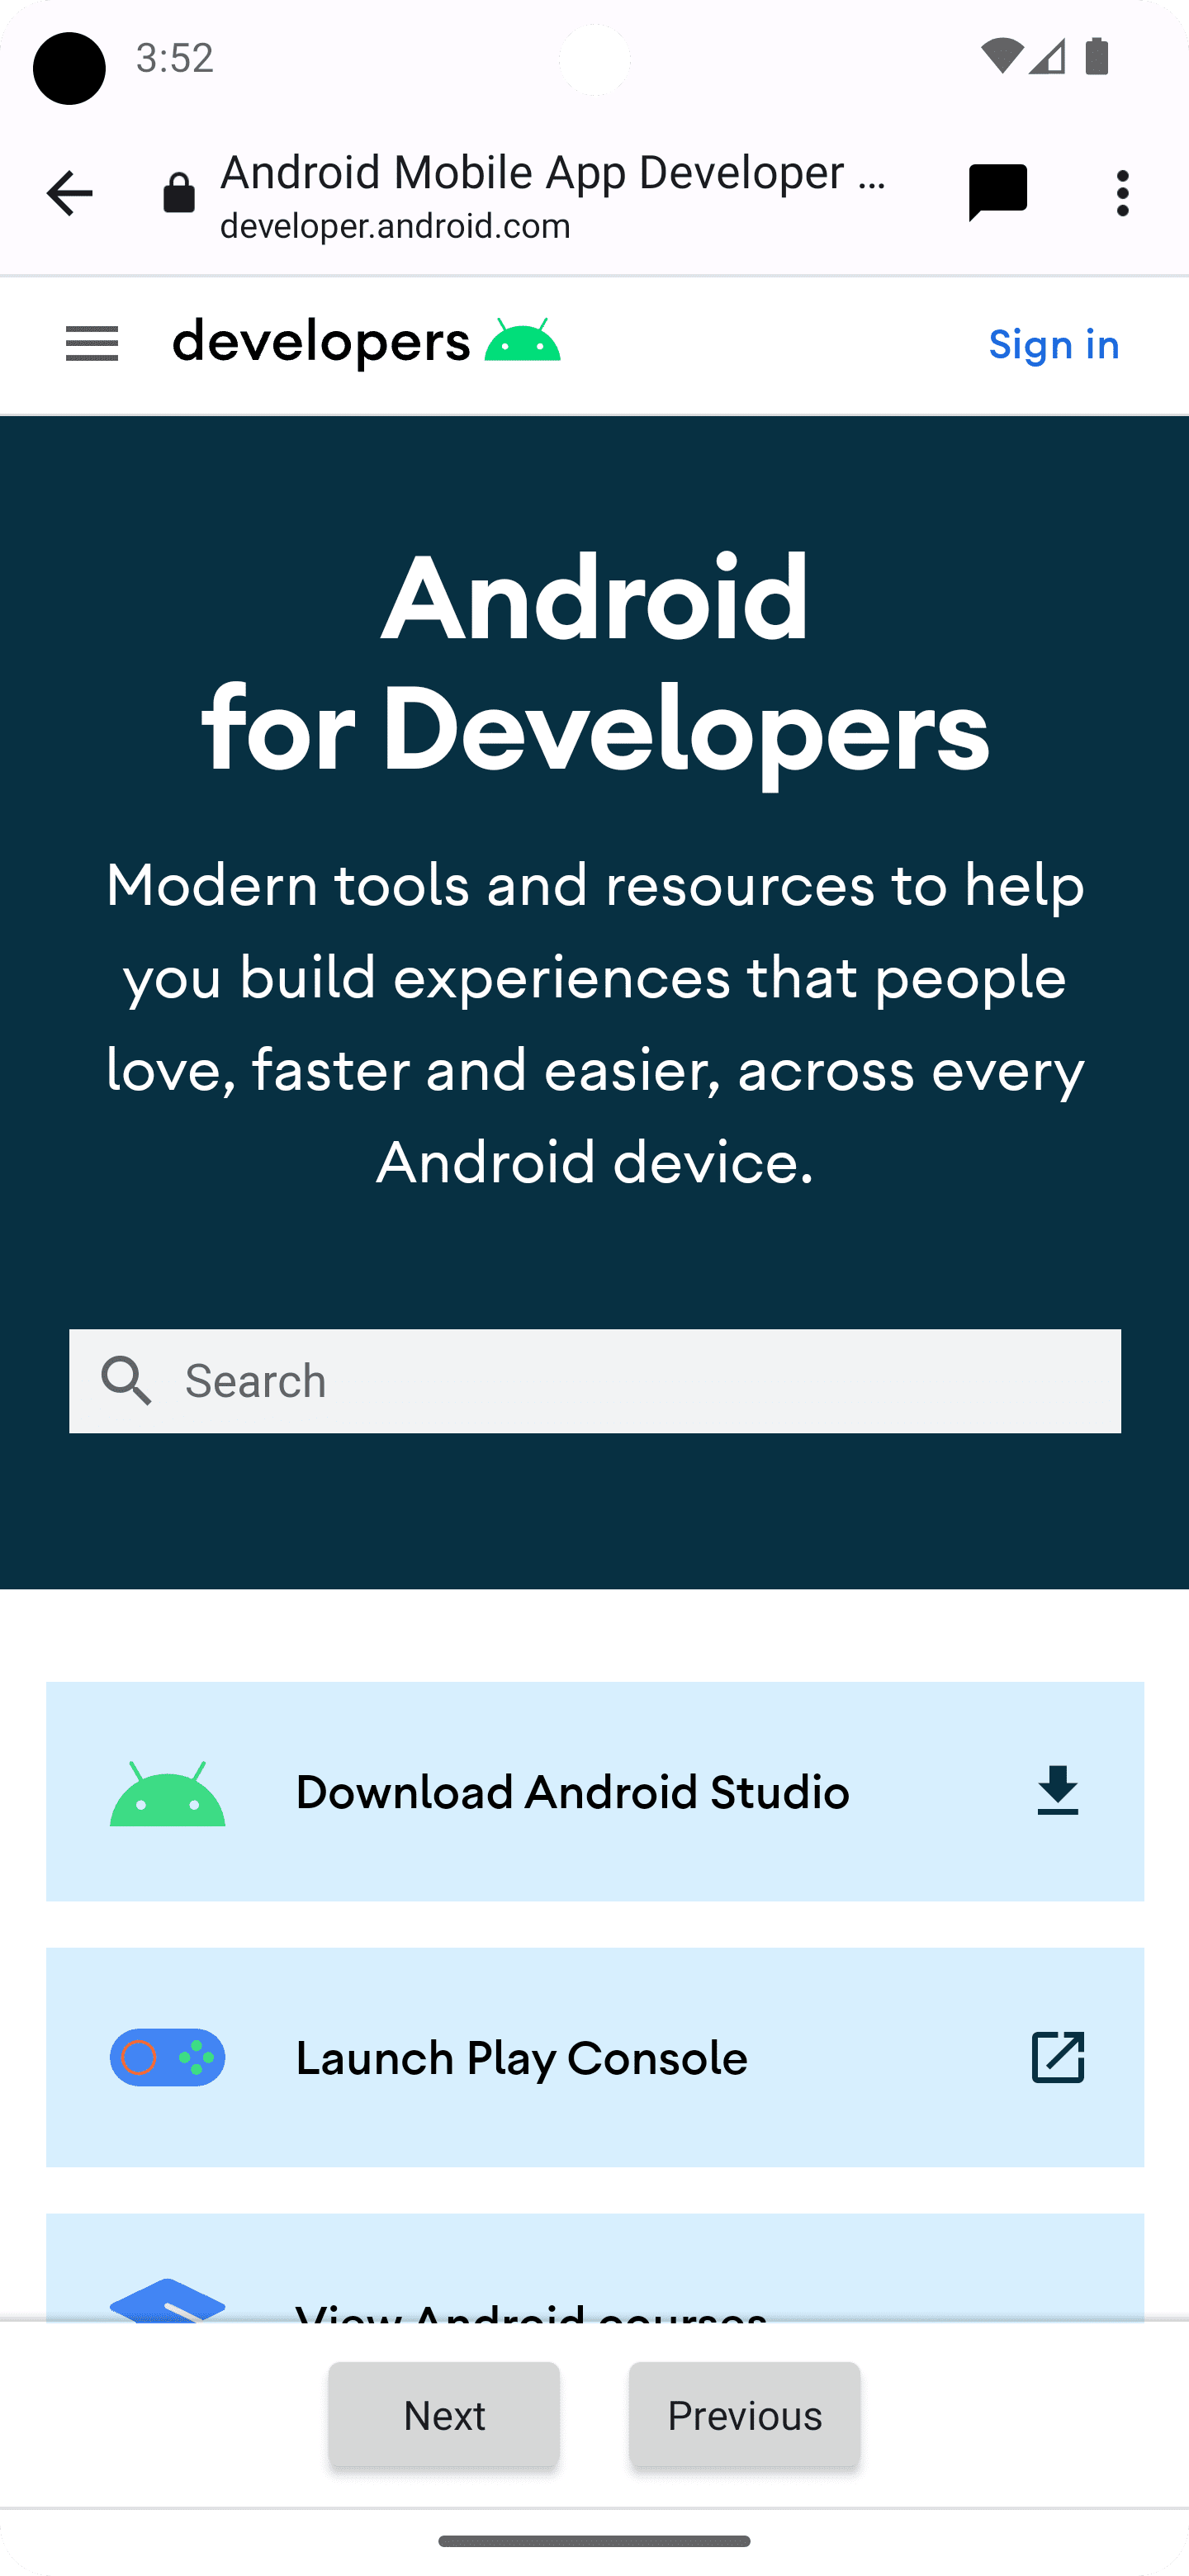
CustomTabIntent.Builder.setSecondaryToolbarViews() में RemoteViews ऑब्जेक्ट पास करके, सबसे नीचे मौजूद टूलबार को अपनी पसंद के मुताबिक बनाया जा सकता है और डाइनैमिक तौर पर अपडेट किया जा सकता है.
सबसे पहले, नई लेआउट फ़ाइल बनाकर टूलबार लेआउट का एलान करें, res/layout/custom_tab_toolbar.xml:
<LinearLayout xmlns:android="http://schemas.android.com/apk/res/android"
    android:layout_width="match_parent"
    android:layout_height="wrap_content"
    android:orientation="horizontal"
    android:gravity="center">

    <Button xmlns:android="http://schemas.android.com/apk/res/android"
        android:id="@+id/ct_toolbar_next"
        android:layout_width="wrap_content"
        android:layout_height="48dp"
        android:layout_margin="8dp"
        android:padding="8dp"
        android:paddingStart="16dp"
        android:paddingEnd="16dp"
        android:text="Next" />

    <Button xmlns:android="http://schemas.android.com/apk/res/android"
        android:id="@+id/ct_toolbar_previous"
        android:layout_width="wrap_content"
        android:layout_height="48dp"
        android:layout_margin="8dp"
        android:padding="8dp"
        android:text="Previous" />
</LinearLayout>
अगला चरण, AndroidManifest.xml फ़ाइल में BroadcastReceiver को रजिस्टर करना है, जो टूलबार इंटरैक्शन को मैनेज करता है:
<application …>
  <receiver android:name=".CustomTabBottomToolbarBroadcastReceiver" />
</application>
इसके बाद, BroadcastReceiver लागू करें. यह सबसे नीचे मौजूद टूलबार के साथ होने वाले सभी इंटरैक्शन को मैनेज करेगा:
public class BottomToolbarBroadcastReceiver extends BroadcastReceiver {

    @Override
    public void onReceive(Context context, Intent intent) {
        String url = intent.getDataString();
        int remoteViewId = intent.getIntExtra(EXTRA_REMOTEVIEWS_CLICKED_ID, -1);
        if (remoteViewId == R.id.ct_toolbar_previous) {
          // handle previous
        } else if (remoteViewId == R.id.ct_toolbar_next) {
          // handle next
        }
    }
}
आखिर में, टूलबार रजिस्टर करें:
// Create the pending intent
Intent actionIntent = new Intent(
       this.getApplicationContext(), BottomToolbarBroadcastReceiver.class);

PendingIntent pendingIntent =
       PendingIntent.getBroadcast(getApplicationContext(), 0 /* request code */, actionIntent, PendingIntent.FLAG_MUTABLE);

// Pass the toolbar layout to the RemoteViews instance
RemoteViews secondaryToolbarViews = new RemoteViews(getPackageName(), R.layout.custom_tab_toolbar);
// All toolbar buttons
int[] clickableIds = {R.id.ct_toolbar_next, R.id.ct_toolbar_previous};

// Register the bottom toolbar when creating a new custom tab intent
CustomTabsIntent intent = new CustomTabsIntent.Builder()
    .setSecondaryToolbarViews(secondaryToolbarViews, clickableIds, toolbarPendingIntent)
    .build();
बुकमार्क और डाउनलोड करने के बटन
तीन बिंदु वाले मेन्यू में, बुकमार्क और डाउनलोड बटन डिफ़ॉल्ट रूप से चालू होते हैं. इन्हें बंद करने के लिए, CustomTabsIntent.Builder में यह कोड इस्तेमाल करें:
CustomTabsIntent customTabsIntent = new CustomTabsIntent.Builder()
    .setBookmarksButtonEnabled(false)
    .setDownloadButtonEnabled(false)
    .build();
अगला लेख: कस्टम टैब में वेब कॉन्टेंट को तेज़ी से लोड करने का तरीका जानें.