

本指南說明如何在自訂分頁中加入自訂互動功能。
啟用預設分享動作
如果您未提供自訂分享動作,建議您在溢位選單中啟用瀏覽器的預設分享動作,方便使用者分享他們正在觀看的內容連結:
    CustomTabsIntent.Builder intentBuilder = new CustomTabsIntent.Builder();
    intentBuilder.setShareState(CustomTabsIntent.SHARE_STATE_ON);
新增自訂動作按鈕
針對重要動作,您可以透過自訂分頁工具列整合自訂動作按鈕,該按鈕可搭配文字標籤或自訂圖示。圖示的高度應為 24dp,寬度為 24-48dp。
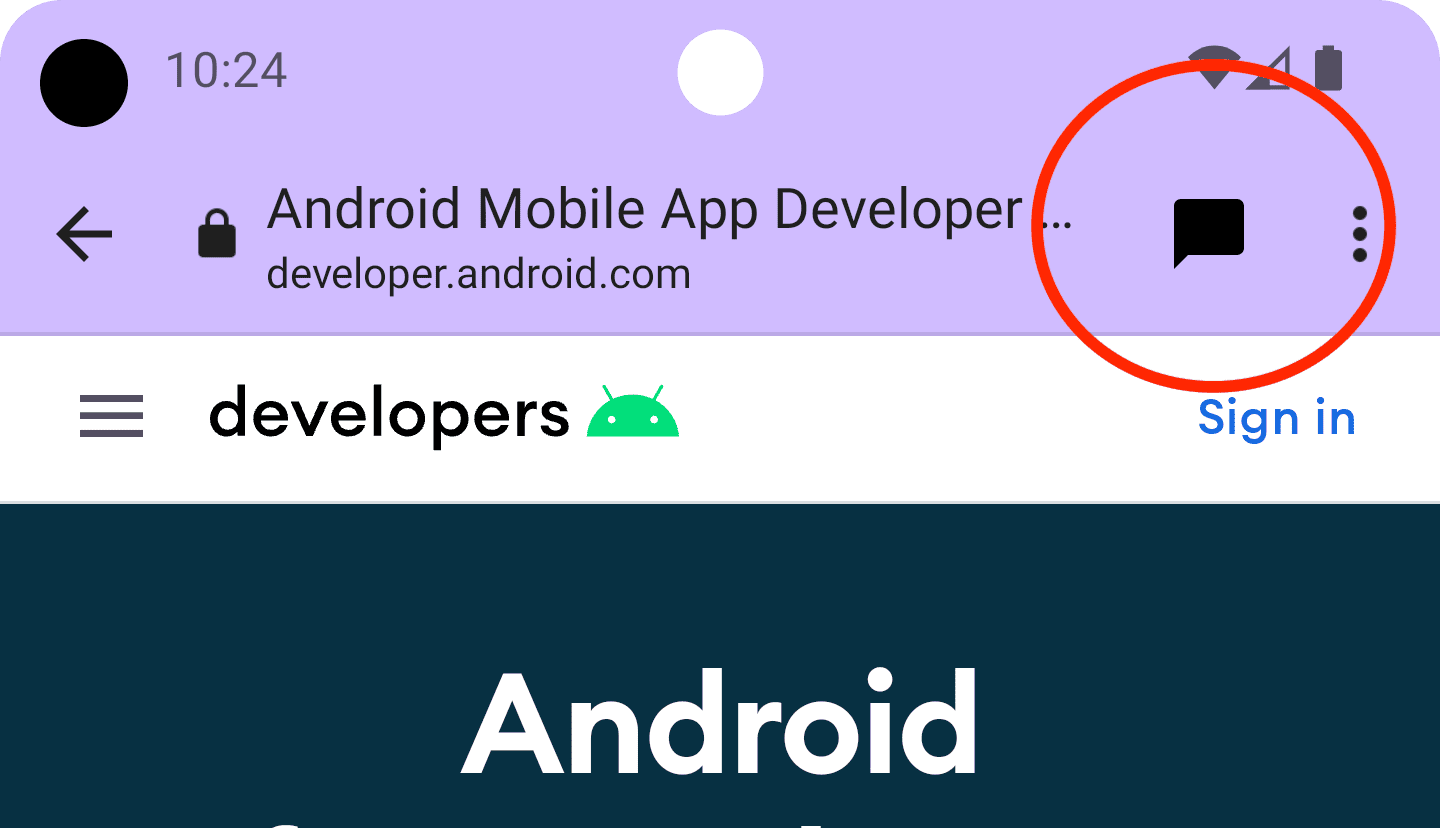
舉例來說,您可以將自訂分享動作新增至工具列。如要這麼做,請建立 BroadcastReceiver,當使用者在「自訂分頁」中點選分享動作時,系統就會呼叫這個函式。
在 AndroidManifest.xml 檔案中註冊 BroadCastReceiver:
<application …>
  <receiver android:name=".ShareBroadcastReceiver" />
</application>
然後新增 ShareBroadcastReceiver 類別。在 onReceive() 方法中,從意圖中擷取目前顯示的網址,並觸發傳送意圖。
public class ShareBroadcastReceiver extends BroadcastReceiver {

    @Override
    public void onReceive(Context context, Intent intent) {
        String url = intent.getDataString();
        Intent sendIntent = new Intent();
        sendIntent.setAction(Intent.ACTION_SEND);
        sendIntent.putExtra(Intent.EXTRA_TEXT, url);
        sendIntent.setType("text/plain");
        Intent shareIntent = Intent.createChooser(sendIntent, null);
        shareIntent.setFlags(Intent.FLAG_ACTIVITY_NEW_TASK);
        context.startActivity(shareIntent);
    }
}
接著,為 ShareBroadcast 建立 PendingIntent,並透過 setActionButton() 註冊。將待處理意圖連同圖示和說明一起傳遞。
String shareDescription = getString(R.string.label_action_share);
Bitmap shareIcon = BitmapFactory.decodeResource(getResources(),
       android.R.drawable.ic_menu_share);

// Create a PendingIntent to your BroadCastReceiver implementation
Intent actionIntent = new Intent(
       this.getApplicationContext(), ShareBroadcastReceiver.class);
PendingIntent pendingIntent =
       PendingIntent.getBroadcast(getApplicationContext(), 0 /* request code */, actionIntent, PendingIntent.FLAG_MUTABLE);

//Set the pendingIntent as the action to be performed when the button is clicked.
CustomTabsIntent intentBuilder = new CustomTabsIntent.Builder()
    …
    .setActionButton(shareIcon, shareDescription, pendingIntent)
    .build();
新增自訂選單項目
自訂分頁提供多達五種瀏覽器預設動作:「前進」、「網頁資訊」、「重新整理」、「在網頁中尋找」和「在瀏覽器中開啟」。此外,您最多可以再新增七個。這些選單項目會插入圖示列和瀏覽器提供的項目之間。(請參閱下圖)。實際數量取決於底層瀏覽器的實作方式。(例如,Chrome 117 版將選單項目數量從五個增加到七個)。因此,建議您先新增最重要的項目。
你可以透過右上角的三點選單存取自訂動作:
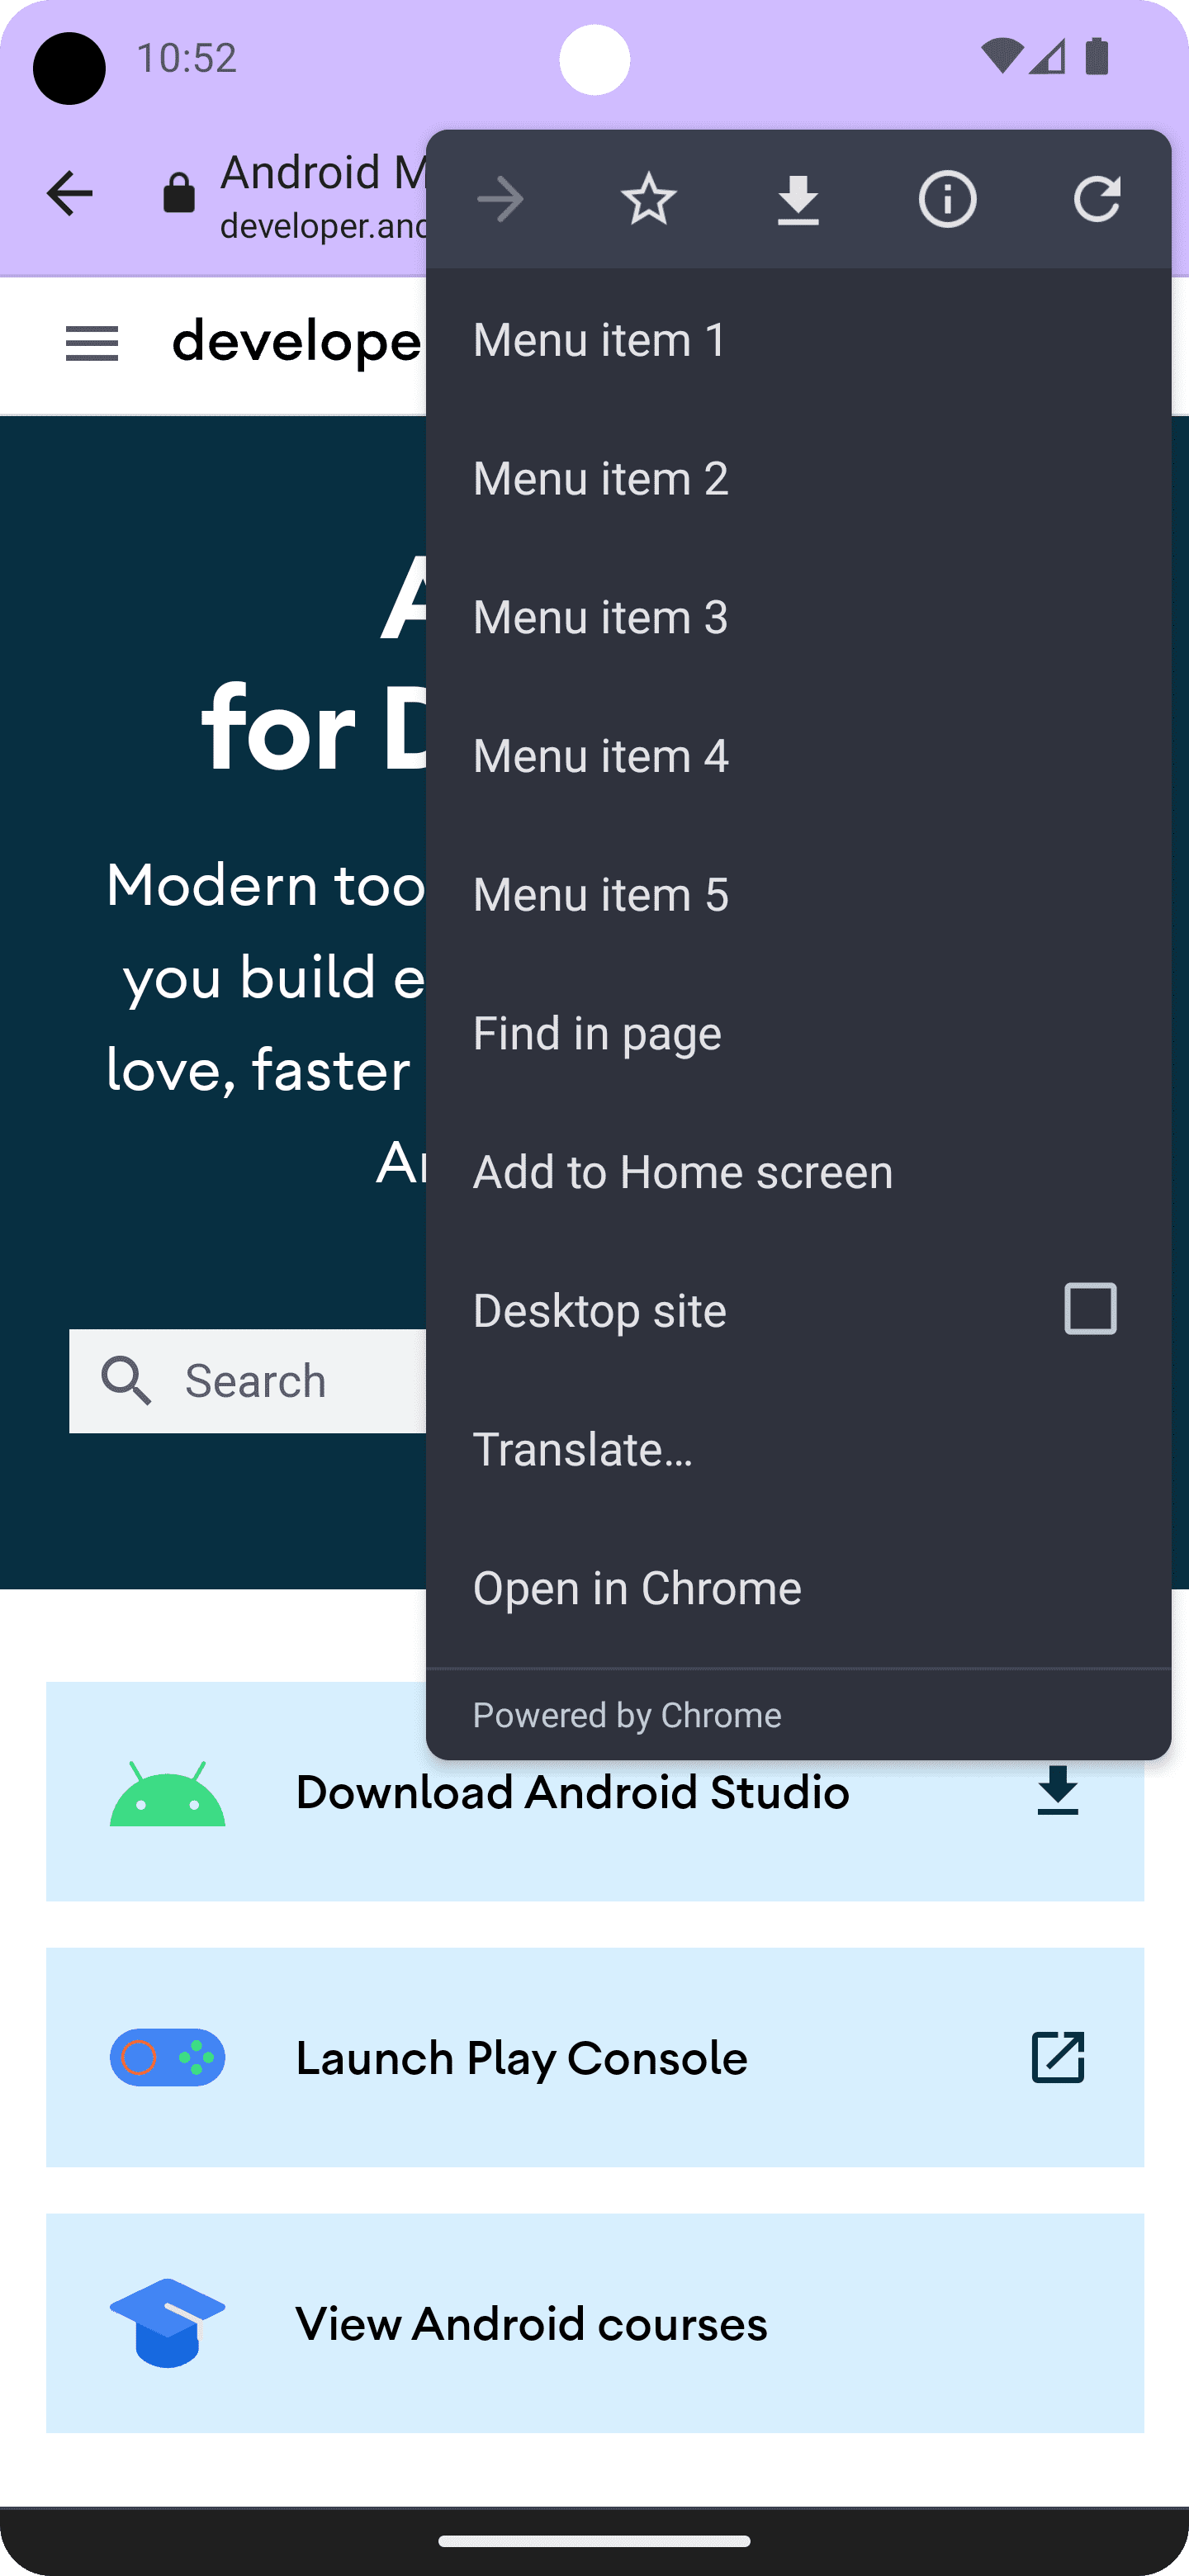
如要新增選單項目,請呼叫 CustomTabsIntent.Builder.addMenuItem(),並提供標題和 PendingIntent。當使用者輕觸選單項目時,瀏覽器會觸發 PendingIntent。
CustomTabsIntent intent = new CustomTabsIntent.Builder()
        ...
        .addMenuItem("Menu item 1", pendingIntent)
        .addMenuItem("Menu item 2", pendingIntent)
        .addMenuItem("Menu item 3", pendingIntent)
        .addMenuItem("Menu item 4", pendingIntent)
        .addMenuItem("Menu item 5", pendingIntent)
        .build();
自訂關閉按鈕
如要讓 Custom Tab 更符合應用程式的流程,請自訂關閉按鈕。如果您希望使用者認為自訂分頁是模式對話方塊,請使用預設的 “X” 按鈕。如果您希望使用者認為自訂分頁是應用程式流程的一部分,請使用返回箭頭。
CustomTabsIntent.Builder intentBuilder = new CustomTabsIntent.Builder();
intentBuilder.setCloseButtonIcon(BitmapFactory.decodeResource(
    getResources(), R.drawable.ic_arrow_back));
新增底部工具列
底部工具列是一種非常靈活的方式,可為自訂分頁新增更多功能。
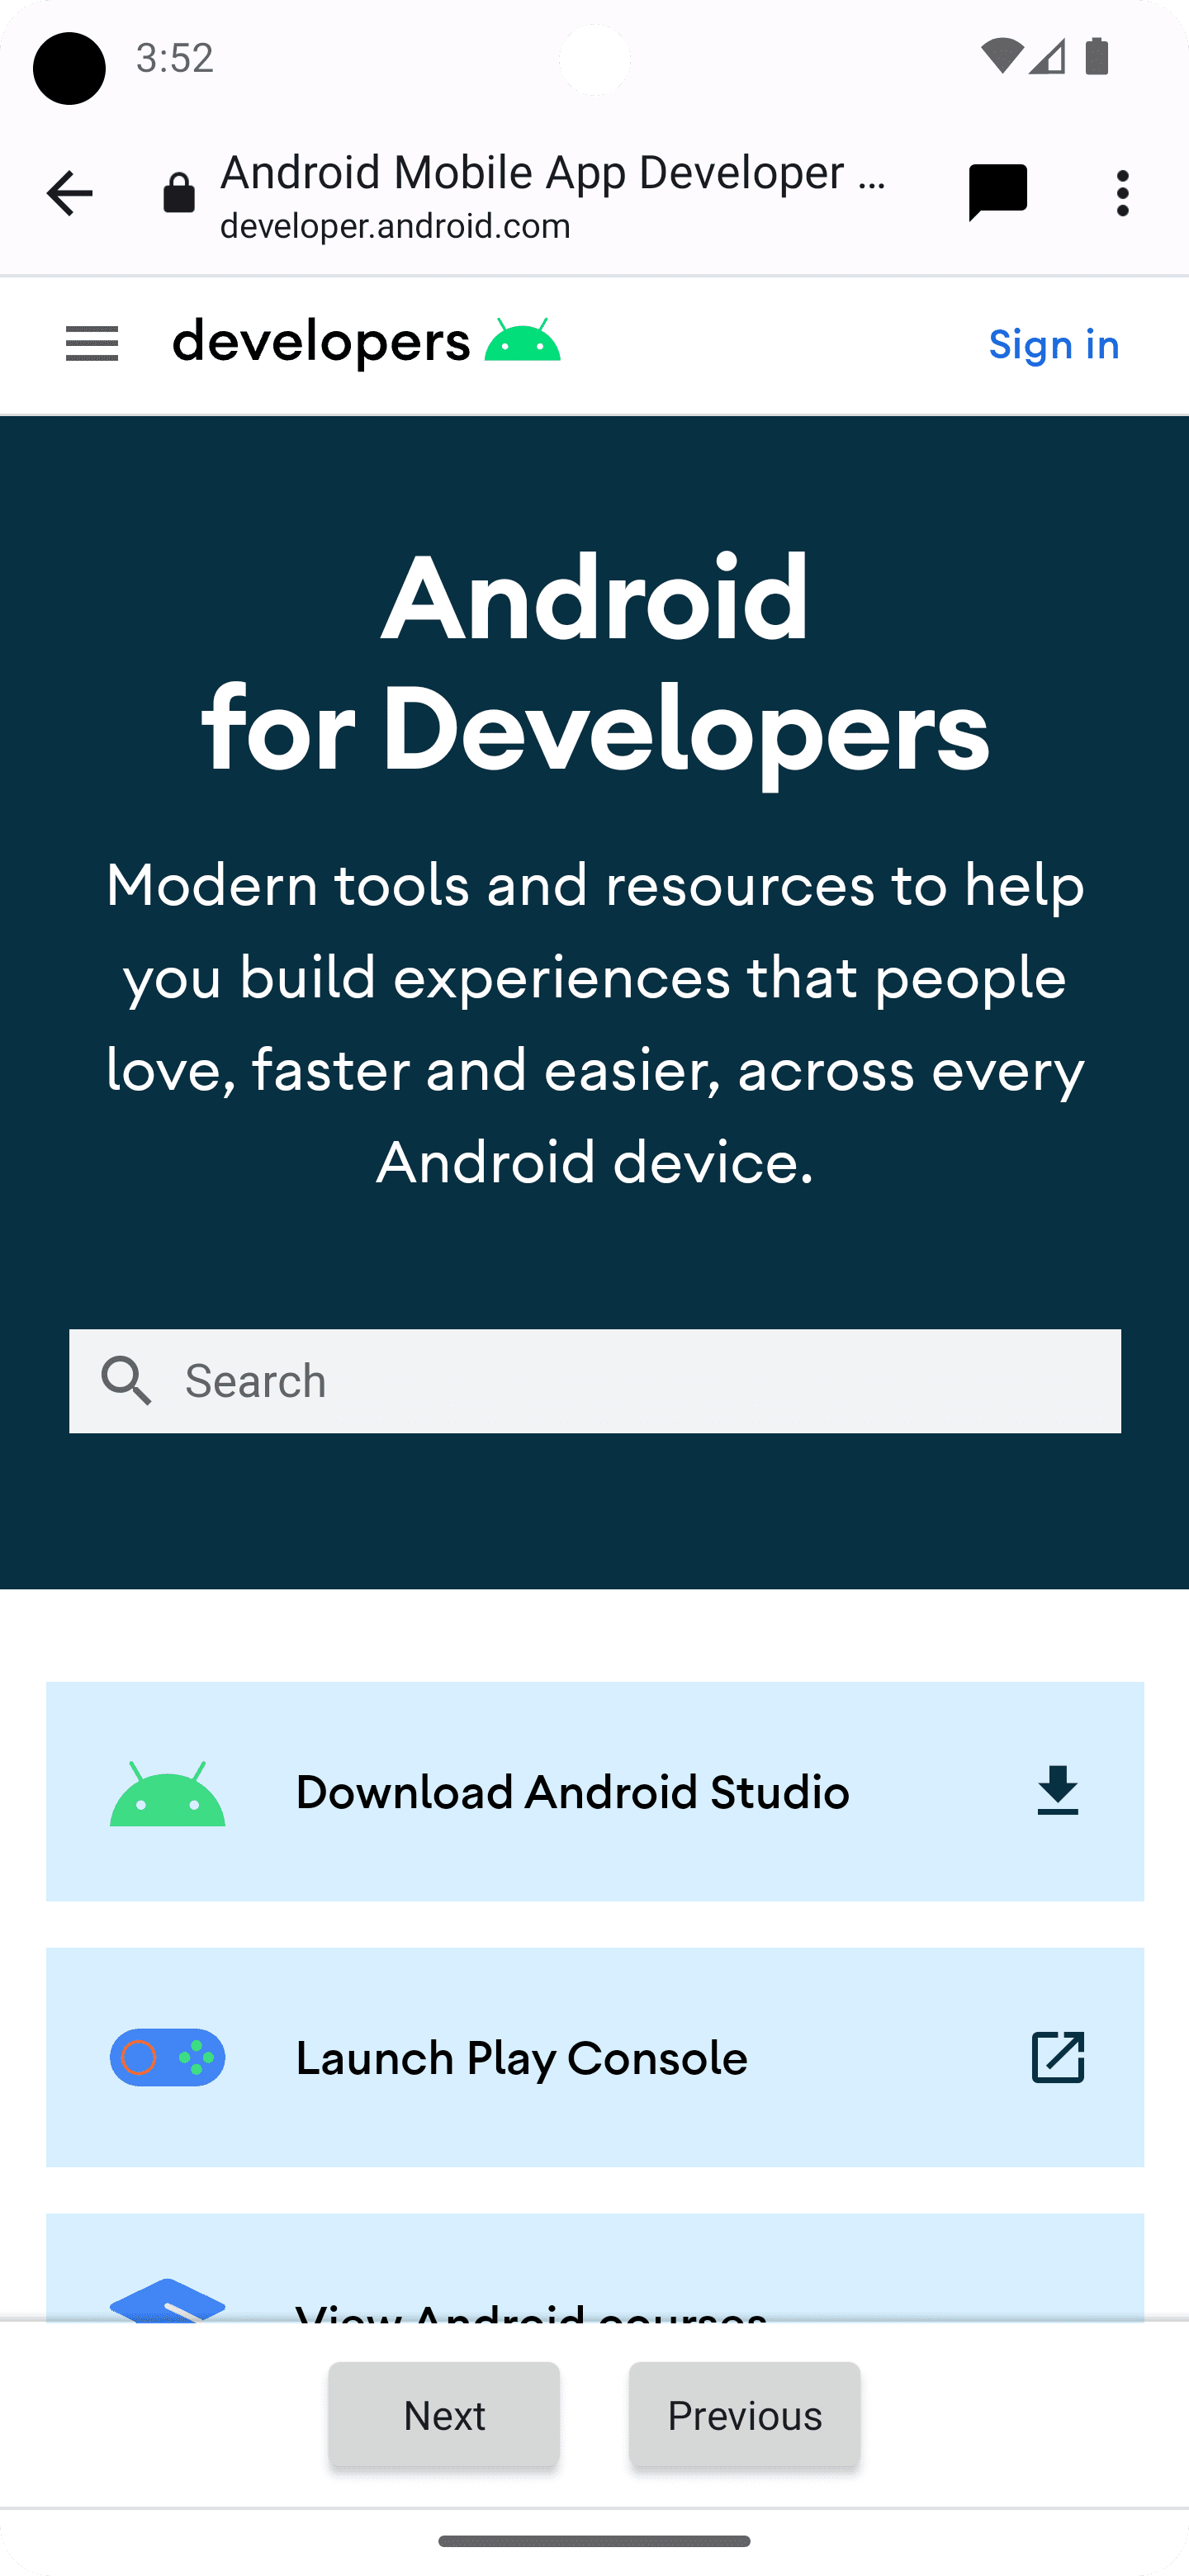
您可以將 RemoteViews 物件傳遞至 CustomTabIntent.Builder.setSecondaryToolbarViews(),即可完全自訂底部工具列並動態更新。
首先,請建立新的版面配置檔案 res/layout/custom_tab_toolbar.xml,宣告工具列版面配置:
<LinearLayout xmlns:android="http://schemas.android.com/apk/res/android"
    android:layout_width="match_parent"
    android:layout_height="wrap_content"
    android:orientation="horizontal"
    android:gravity="center">

    <Button xmlns:android="http://schemas.android.com/apk/res/android"
        android:id="@+id/ct_toolbar_next"
        android:layout_width="wrap_content"
        android:layout_height="48dp"
        android:layout_margin="8dp"
        android:padding="8dp"
        android:paddingStart="16dp"
        android:paddingEnd="16dp"
        android:text="Next" />

    <Button xmlns:android="http://schemas.android.com/apk/res/android"
        android:id="@+id/ct_toolbar_previous"
        android:layout_width="wrap_content"
        android:layout_height="48dp"
        android:layout_margin="8dp"
        android:padding="8dp"
        android:text="Previous" />
</LinearLayout>
接下來,請在 AndroidManifest.xml 檔案中註冊 BroadcastReceiver,以便處理工具列互動:
<application …>
  <receiver android:name=".CustomTabBottomToolbarBroadcastReceiver" />
</application>
接著實作 BroadcastReceiver,該函式會處理與底部工具列的所有互動:
public class BottomToolbarBroadcastReceiver extends BroadcastReceiver {

    @Override
    public void onReceive(Context context, Intent intent) {
        String url = intent.getDataString();
        int remoteViewId = intent.getIntExtra(EXTRA_REMOTEVIEWS_CLICKED_ID, -1);
        if (remoteViewId == R.id.ct_toolbar_previous) {
          // handle previous
        } else if (remoteViewId == R.id.ct_toolbar_next) {
          // handle next
        }
    }
}
最後,註冊工具列:
// Create the pending intent
Intent actionIntent = new Intent(
       this.getApplicationContext(), BottomToolbarBroadcastReceiver.class);

PendingIntent pendingIntent =
       PendingIntent.getBroadcast(getApplicationContext(), 0 /* request code */, actionIntent, PendingIntent.FLAG_MUTABLE);

// Pass the toolbar layout to the RemoteViews instance
RemoteViews secondaryToolbarViews = new RemoteViews(getPackageName(), R.layout.custom_tab_toolbar);
// All toolbar buttons
int[] clickableIds = {R.id.ct_toolbar_next, R.id.ct_toolbar_previous};

// Register the bottom toolbar when creating a new custom tab intent
CustomTabsIntent intent = new CustomTabsIntent.Builder()
    .setSecondaryToolbarViews(secondaryToolbarViews, clickableIds, toolbarPendingIntent)
    .build();
書籤和下載按鈕
根據預設,三點圖示選單中的書籤和下載按鈕會啟用。如要停用這些功能,請在 CustomTabsIntent.Builder 中使用下列程式碼:
CustomTabsIntent customTabsIntent = new CustomTabsIntent.Builder()
    .setBookmarksButtonEnabled(false)
    .setDownloadButtonEnabled(false)
    .build();
接下來:瞭解如何加快自訂分頁中的網頁內容載入速度。