

Published: May 20, 2025
To meet your users' needs, whatever platform or hardware they use, you can set up a fallback to the cloud with Firebase AI Logic for the built-in Prompt API.
Build a hybrid AI experience
Built-in AI comes with a number of benefits, most notably:
- Local processing of sensitive data: If you work with sensitive data, you can offer AI features to users with end-to-end encryption.
- Offline AI usage: Your users can access AI features, even when they're offline or have lapsed connectivity
While these benefits don't apply to cloud applications, you can ensure a seamless experience for those who cannot access built-in AI.
Get started with Firebase
Learn how to create a Firebase project and add Firebase to your web app.
Firebase projects are Google Cloud projects, with Firebase-specific configurations and services. Learn more about Google Cloud and Firebase.
Install the SDK
This workflow uses npm and requires module bundlers or JavaScript framework tooling. Firebase AI Logic is optimized to work with module bundlers to eliminate unused code and decrease SDK size.
Install the Firebase JS SDK:
npm install firebase
Set up and secure Firebase AI Logic
In the Firebase console, go to AI Services > AI Logic.
Click Get started to launch the setup workflow.
When asked to choose a "Gemini API provider", we recommend selecting the Gemini Developer API, which lets you get started quickly at no cost.
At any point later, you can always set up the Vertex AI Gemini API (and its requirement for billing).
Continue in the console's workflow to set up the required APIs and associated services for Firebase AI Logic.
Starting early July 2026, this stage of the workflow automatically enforces Firebase App Check for AI Logic, which is a critical service to help protect the Gemini API when it's directly accessed from your app. As part of getting started (see steps later in this guide), you'll need to configure the App Check debug provider for local development when App Check is enforced.
Continue to the next sections in this guide to configure the App Check debug provider for local development and then send your first request to the Gemini API.
Configure the App Check debug provider for local development
Here's how to use the debug provider while running your app from localhost
interactively (for example, during local development):
In your debug build, enable debug mode by setting
self.FIREBASE_APPCHECK_DEBUG_TOKENtotruebefore you initialize App Check. For example:self.FIREBASE_APPCHECK_DEBUG_TOKEN = true; initializeAppCheck(app, { /* App Check options */ });Visit your web app locally and open the browser's developer tools. In the debug console, you'll see a debug token:
AppCheck debug token: "123a4567-b89c-12d3-e456-789012345678".
You will need to safelist it in the Firebase console for it to work.
Register your debug token with App Check:
In the Firebase console, go to the Security > App Check > Apps tab.
Find your app, click the overflow menu (), and then select Manage debug tokens.
Follow the on-screen instructions to register your debug token.
For details about the debug provider (including how to get a new debug token), check out the official App Check docs.
Send a request to the Gemini API
Prompt the model with text or multimodal input. See examples in the following subsections of this guide.
Text prompts
You can use plain text for your instructions to the model. For example, you could ask the model to tell you a joke.
You have some options for how the request is routed:
Use the built-in AI by default when it's available by setting the
modeto'prefer_on_device'in thegetGenerativeModel()function. If the built-in model isn't available, the request will fall back seamlessly to use the cloud model (if you're online).Use the cloud model by default when you're online by setting the
modeto'prefer_in_cloud'in thegetGenerativeModel()function. If you're offline, the request will fall back seamlessly to use the built-in AI when available.
// Initialize the Google AI service.
const googleAI = getAI(firebaseApp);

// Create a `GenerativeModel` instance with a model that supports your use case.
const model = getGenerativeModel(googleAI, { mode: 'prefer_on_device' });

const prompt = 'Tell me a joke';

const result = await model.generateContentStream(prompt);

for await (const chunk of result.stream) {
  const chunkText = chunk.text();
  console.log(chunkText);
}
console.log('Complete response', await result.response);
Multimodal prompts
You can also prompt with image or audio, in addition to text. You could tell the model to describe an image's contents or transcribe an audio file.
Images need to be passed as a base64-encoded string as a Firebase FileDataPart
object, which you can do with the helper function fileToGenerativePart().
// Converts a File object to a `FileDataPart` object.
// https://firebase.google.com/docs/reference/js/vertexai.filedatapart
async function fileToGenerativePart(file) {
    const base64EncodedDataPromise = new Promise((resolve) => {
      const reader = new FileReader();
      reader.onload = () => resolve(reader.result.split(',')[1]);
      reader.readAsDataURL(file);
    });

    return {
      inlineData: { data: await base64EncodedDataPromise, mimeType: file.type },
    };
  }

  const fileInputEl = document.querySelector('input[type=file]');

  fileInputEl.addEventListener('change', async () => {
    const prompt = 'Describe the contents of this image.';

    const imagePart = await fileToGenerativePart(fileInputEl.files[0]);

    // To generate text output, call generateContent with the text and image
    const result = await model.generateContentStream([prompt, imagePart]);

    for await (const chunk of result.stream) {
      const chunkText = chunk.text();
      console.log(chunkText);
    }
    console.log(Complete response: ', await result.response);
  });
Demo
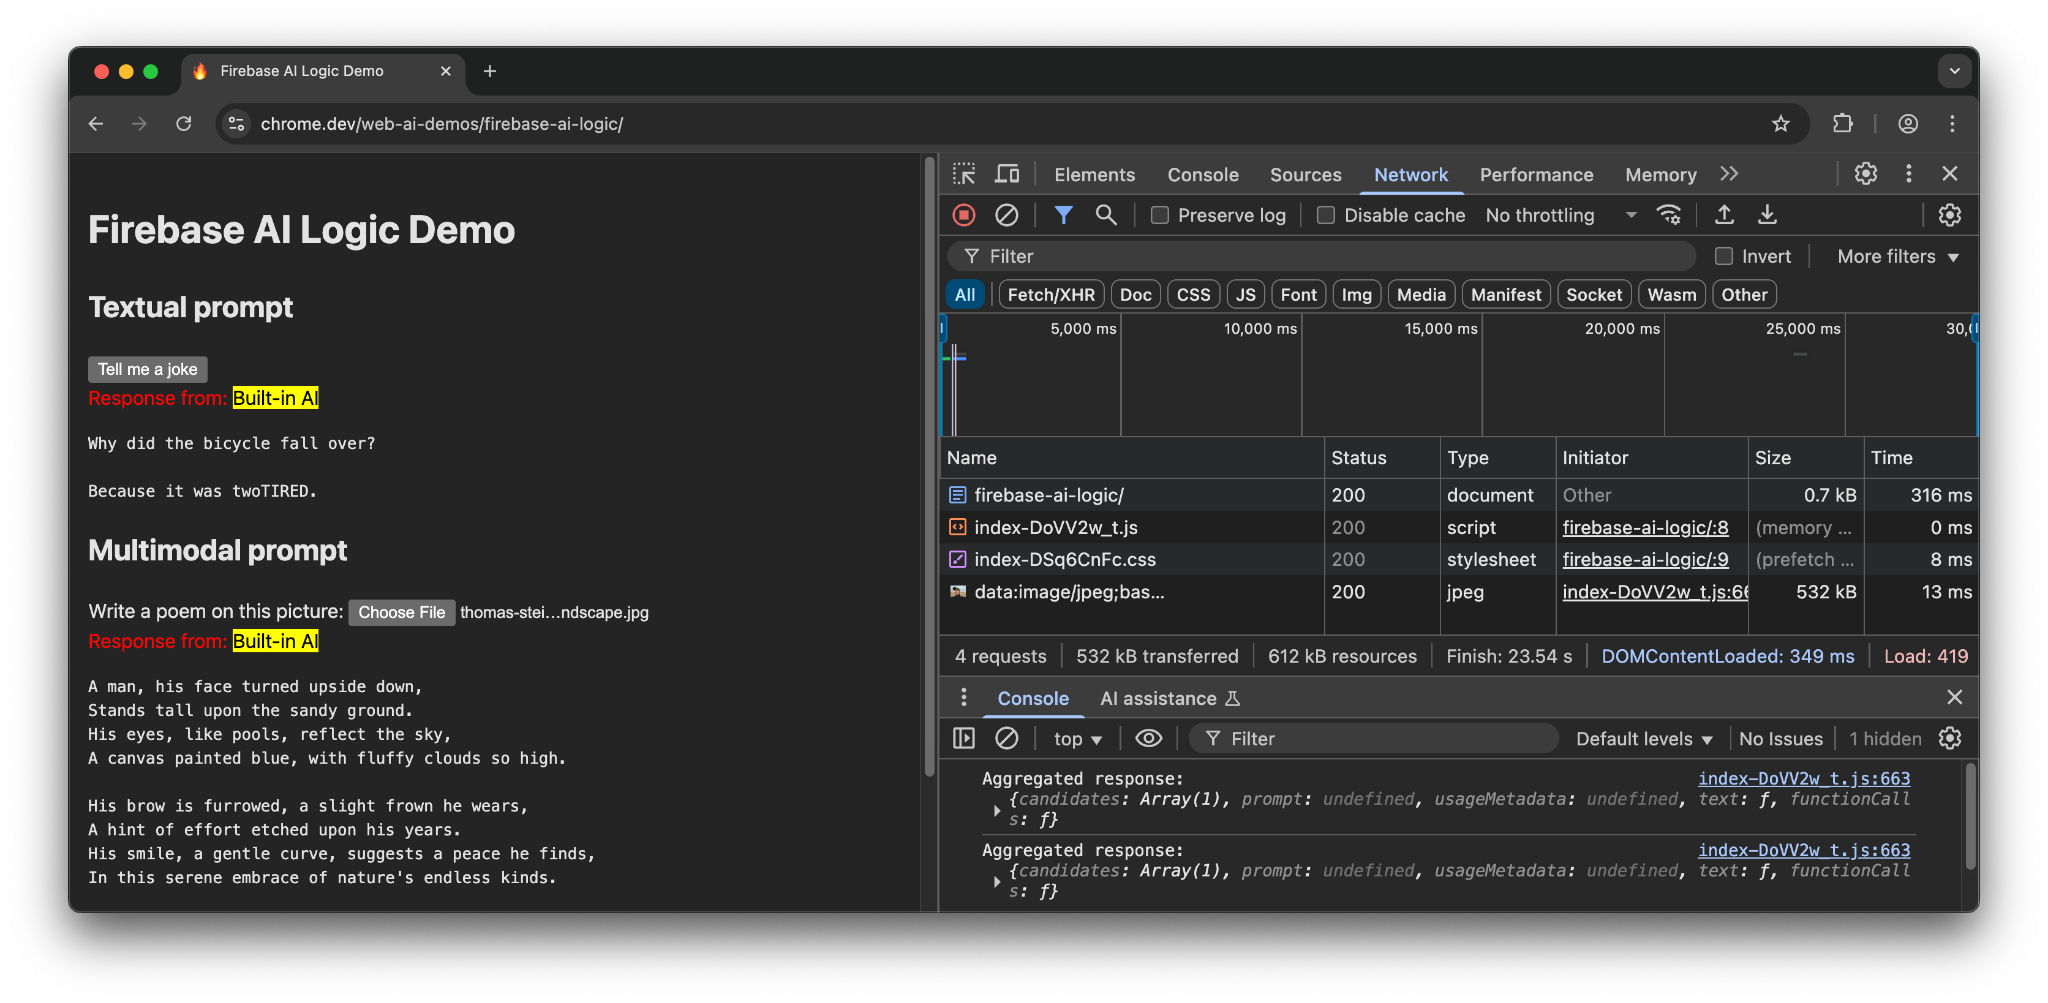
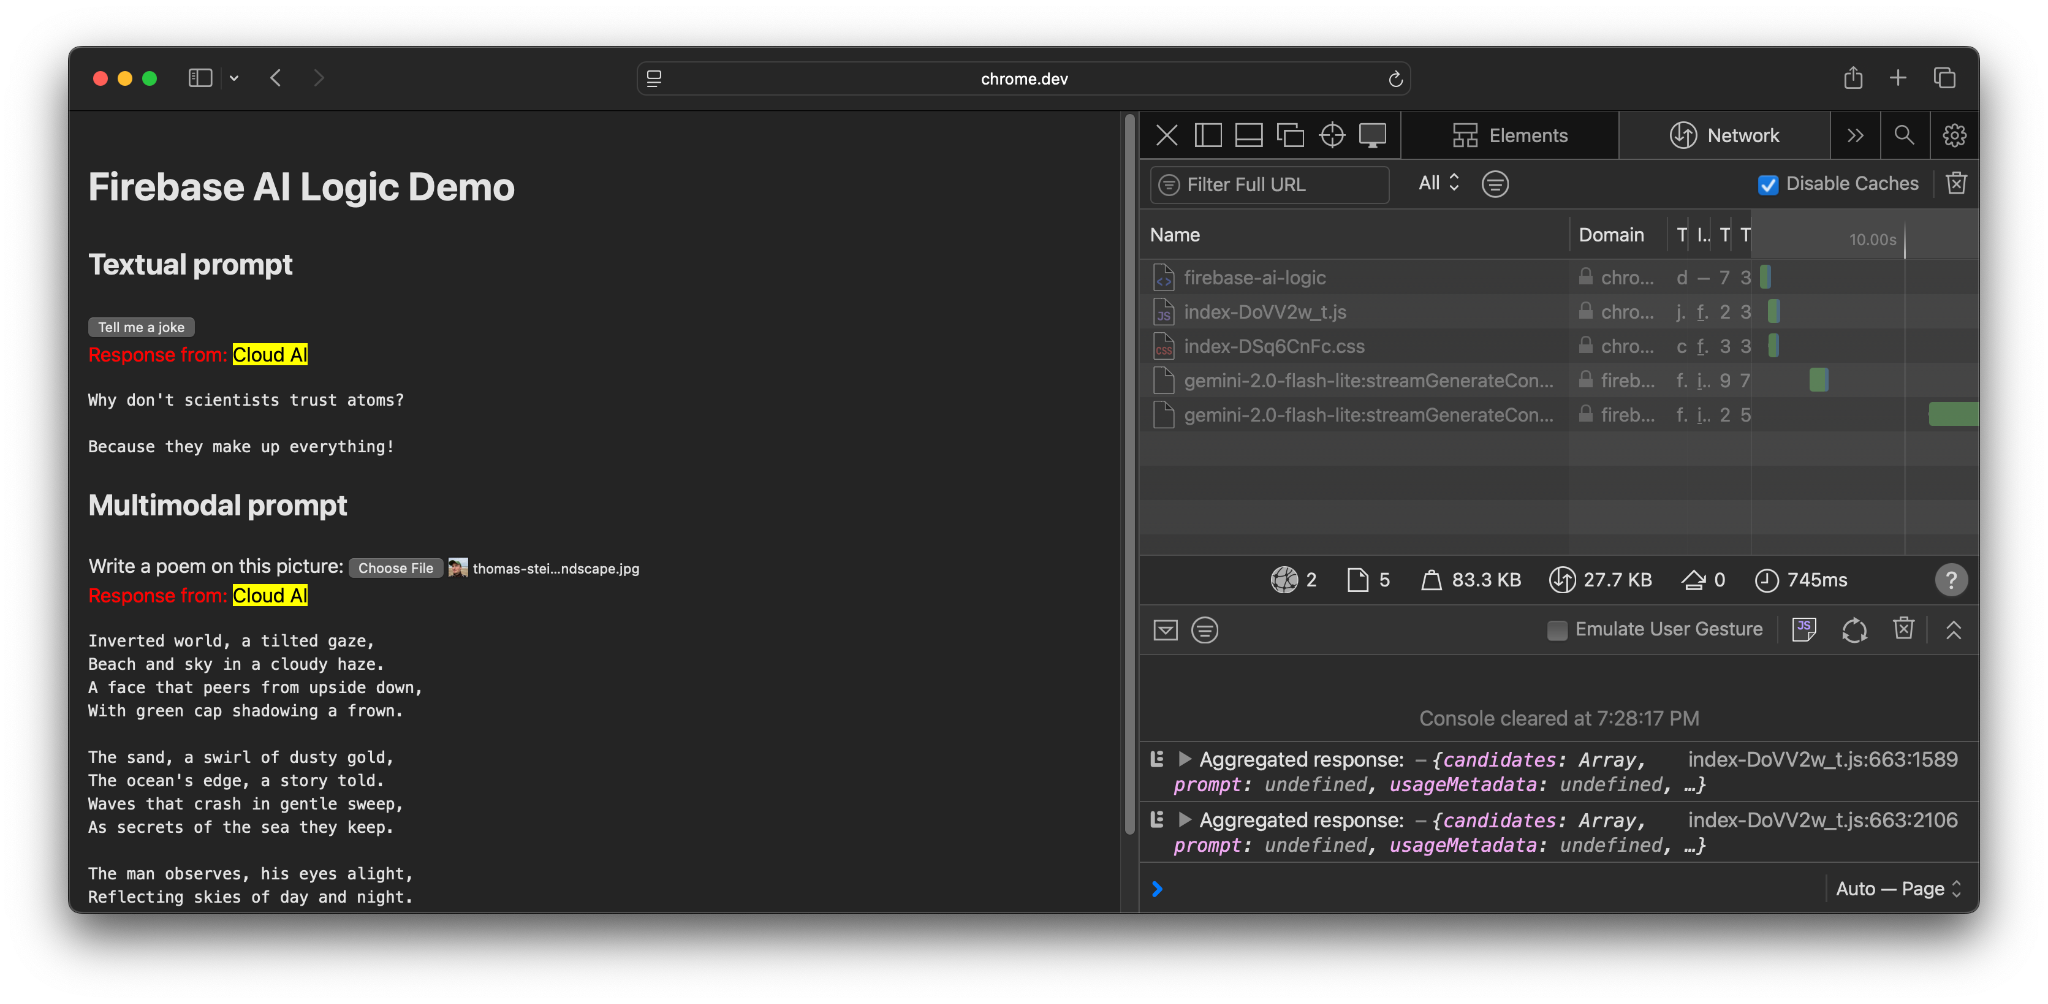
Visit the Firebase AI Logic demo on different devices and browsers. You can see how the model response comes from either the built-in AI model or the cloud.
When on supported hardware in Chrome, the demo uses the Prompt API and Gemini Nano. There are only 3 requests made for the main document, the JavaScript file, and the CSS file.
When in another browser or an operating system without built-in AI support,
there is an additional request made to the Firebase endpoint,
https://firebasevertexai.googleapis.com.
Participate and share feedback
Firebase AI Logic can be a great option to integrate AI capabilities to your web apps. By providing a fallback to the cloud when the Prompt API is unavailable, the SDK ensures wider accessibility and reliability of AI features.
Remember that cloud applications create new expectations for privacy and functionality, so it's important to inform your users of where their data is being processed.
- For feedback on Chrome's implementation, file a bug report or a feature request.
- For feedback on Firebase AI Logic, file a bug report.