
The Chrome Web Store API lets you upload new versions of your items, publish them, and check their status. This guide will tell you how to:
- Get a refresh token and access token to use in the tool of your choice.
- Make test HTTP requests using the OAuth 2.0 Playground.
Prerequisites
Before using the API, note the following:
- Developers are required to enable 2-step verification for their Google Account to publish or update an existing extension.
- The API can not create new items. Upload the first version of your extension in the Developer Dashboard and fill out the Store listing and Privacy tabs. After that, you can upload and publish new versions with the API.
Authorization
The API uses OAuth 2.0. Requests that change an item (upload, publish,
cancelSubmission, rollback, and setPublishedDeployPercentage) require the
https://www.googleapis.com/auth/chromewebstore scope. Read-only requests
(fetchStatus, fetchReviews, getRatingSummary, and queryMetrics) accept
either that scope or https://www.googleapis.com/auth/chromewebstore.readonly.
These are the same scopes the V1 API used, so credentials and refresh tokens created for V1 keep working with V2. V2 also accepts service accounts.
Initial setup
Before you can begin making REST calls against the Chrome Web Store, you will need to enable the Chrome Web Store API in a Google Cloud project, configure an OAuth consent screen, and retrieve your API access keys. The following sections walk through this process.
Enable the Chrome Web Store API
- Go to the Google Cloud Console.
- Create a new project or select an existing one.

Create a new project in the Google Console - In the search bar type "Chrome Web Store API".
- Enable the Chrome Web Store API.
Configure the OAuth consent screen
- Go to OAuth consent screen.
- Select External then Create.

Create an OAuth consent screen. - Fill out the required App information fields (listed below) then click
Save and Continue.
- App name.
- User support email.
- Developer contact information.
- Click Save and Continue to skip the Scopes screen.
- Add your email address to Test users, then click Save and Continue. This lets you immediately use the project without needing to go through an approval process.
Create an OAuth Client
- Go to Credentials.
- Click Create Credentials then OAuth client ID.

Create credentials. - For Application type, choose Web application.
- Enter a name.
- Add
https://developers.google.com/oauthplaygroundto the list of Authorized redirect URIs. - Click "Create".
You will be given a client ID and a client secret. Keep these safe.
Obtain access and refresh tokens
Open https://developers.google.com/oauthplayground.

OAuth Playground. Click the settings icon in the top right, and choose "Use your own OAuth credentials".
Enter your client ID and client secret.
Add
https://www.googleapis.com/auth/chromewebstoreto the "Input your own scopes" field.Click "Authorize APIs".
Follow the steps to sign in with your Google Account.
Click "Exchange authorization code for tokens" to generate a new access token.
Obtain your publisher ID
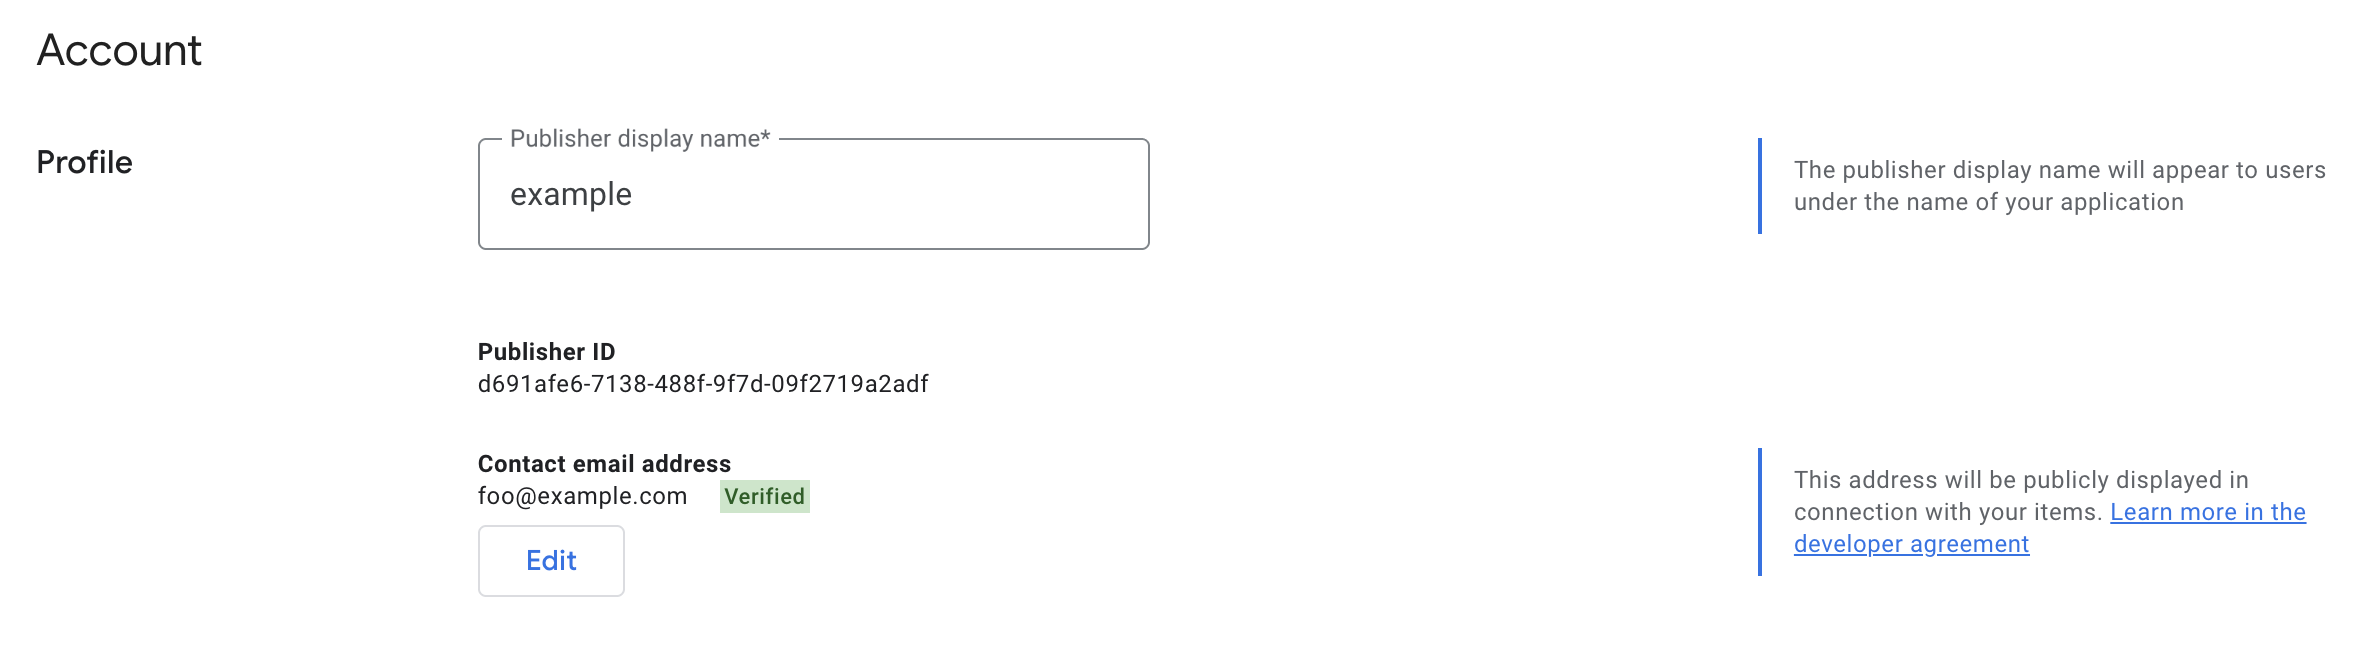
Find your publisher ID in the Developer Dashboard. You'll need this as part of the URL path for API endpoints.
Your publisher ID is displayed in the Publisher > Settings section:
Obtain your item ID
Each item has a 32-character ID, which is the same as the extension ID. Find it
in the Developer Dashboard on the item's Package tab, or on
the chrome://extensions page with Developer mode enabled. You'll need this
as part of the URL path for API endpoints.
Try a request
To try a request, copy the following to the Request URI field:
https://chromewebstore.googleapis.com/v2/publishers/PUBLISHER_ID/items/EXTENSION_ID:fetchStatus
Then, click "Send the request".
Publishing workflow
To release a new version of an existing item with the API, follow these steps.
- Increase the version in your manifest and zip your extension files.
- Call
uploadwith the ZIP file. - If the response's
uploadStateisIN_PROGRESS, pollfetchStatusuntil the upload has finished. - Call
publishto submit the new version for review. - Call
fetchStatusto check the review status of the submitted revision.
Example HTTP requests
Once you have a refresh token, you can obtain new access tokens and make API
calls outside of the playground using the tool of your choice. Below we show a
number of examples using curl.
Refresh your access token
Periodically, your access token will expire and you will need to obtain a new
one. To refresh your access token, make a request with your refresh token.
For example, using curl, you can get an access token by executing the
following command (replacing the values of $CLIENT_ID, $CLIENT_SECRET, and
$REFRESH_TOKEN with your own values):
curl "https://oauth2.googleapis.com/token" -d "client_secret=$CLIENT_SECRET&grant_type=refresh_token&refresh_token=$REFRESH_TOKEN&client_id=$CLIENT_ID"This will return a result such as:
{
  "access_token" : "ya29...",
  "expires_in" : 3600,
  "refresh_token" : "1/rwn...",
  "scope": "https://www.googleapis.com/auth/chromewebstore",
  "token_type" : "Bearer",
}
Upload a package to update an existing store item
Your updates will continue to go through the standard review process. See Review process to learn more.
Use upload to upload a new ZIP file for an existing item. If you have not
increased the version field in your extension's manifest file, this
will fail.
Send the ZIP file as the request body to the /upload/ URI. The method takes no other parameters.
The response includes the uploadState. If it is IN_PROGRESS, poll
fetchStatus until the upload finishes. The maximum package size is 2 GB.
To upload a CRX file instead of a ZIP file, add the following headers so the server treats the package as a CRX file.
X-Goog-Upload-Protocol: raw
X-Goog-Upload-File-Name: EXTENSION_FILE_NAME.crx
Check the status of an item
Use fetchStatus to check the upload status of an item if the most recent
upload attempt returned IN_PROGRESS in the uploadState field, or to check
the review status of a submitted revision.
curl -H "Authorization: Bearer $TOKEN" -X GET -v https://chromewebstore.googleapis.com/v2/publishers/PUBLISHER_ID/items/EXTENSION_ID:fetchStatusPublish an item
Use publish to publish an item to all users. The item will be submitted for
review and published when the item passes.
curl -H "Authorization: Bearer $TOKEN" -X POST -v https://chromewebstore.googleapis.com/v2/publishers/PUBLISHER_ID/items/EXTENSION_ID:publishItems are always published with the existing visibility settings. If you have manually changed the settings in the Developer Dashboard, you won't be able to publish using the API until you have manually published with the new visibility at least once.
Update percentage rollout
If your item has over 10,000 seven-day active users, you can update the current target percentage for percentage rollout.
curl -H "Authorization: Bearer $TOKEN" -X POST -H "Content-Type: application/json" -d "{ "deployPercentage": 100 }" -v https://chromewebstore.googleapis.com/v2/publishers/PUBLISHER_ID/items/EXTENSION_ID:setPublishedDeployPercentageCancel a submission
Use cancelSubmission to cancel an active submission which is under review.
curl -H "Authorization: Bearer $TOKEN" -X POST -v https://chromewebstore.googleapis.com/v2/publishers/PUBLISHER_ID/items/EXTENSION_ID:cancelSubmissionUse a service account
Optionally, you can grant a service account access to the API. Learn more in Use a service account with the Chrome Web Store API.