

拡張機能で Chrome ブラウザをカスタマイズできるのと同様に、オプション ページでは拡張機能をカスタマイズできます。オプションを使用して機能を有効にし、ユーザーがニーズに関連する機能を選択できるようにします。
オプション ページを見つける
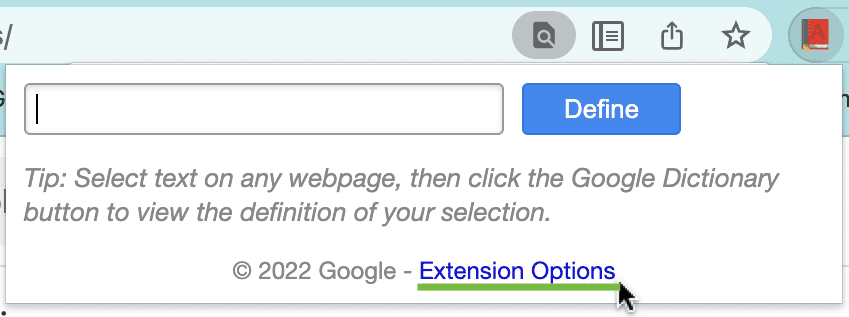
ユーザーは、直接リンクからオプション ページにアクセスするか、ツールバーの拡張機能アイコンを右クリックしてオプションを選択します。また、ユーザーは、まず chrome://extensions を開き、目的の拡張機能を見つけて [詳細] をクリックし、オプションのリンクを選択することで、オプション ページに移動できます。
![[コンテキスト メニュー オプション] ページ](https://developer.chrome.com/static/docs/extensions/develop/ui/options-page/image/context-menu-options-page-3d4d2c8dcce27.png?authuser=31&hl=ja)
オプション ページを作成する
オプション ページの例を次に示します。
options.html:
<!DOCTYPE html>
<html>
  <head>
    <title>My Test Extension Options</title>
  </head>
  <body>
    <select id="color">
      <option value="red">red</option>
      <option value="green">green</option>
      <option value="blue">blue</option>
      <option value="yellow">yellow</option>
    </select>

    <label>
      <input type="checkbox" id="like" />
      I like colors.
    </label>

    <div id="status"></div>
    <button id="save">Save</button>

    <script src="options.js"></script>
  </body>
</html>
以下はオプション スクリプトの例です。options.html と同じフォルダに保存します。これにより、storage.sync API を使用して、ユーザーが選択したオプションがデバイス間で保存されます。
options.js:
// Saves options to browser.storage
const saveOptions = () => {
  const color = document.getElementById('color').value;
  const likesColor = document.getElementById('like').checked;

  browser.storage.sync.set(
    { favoriteColor: color, likesColor: likesColor },
    () => {
      // Update status to let user know options were saved.
      const status = document.getElementById('status');
      status.textContent = 'Options saved.';
      setTimeout(() => {
        status.textContent = '';
      }, 750);
    }
  );
};

// Restores select box and checkbox state using the preferences
// stored in browser.storage.
const restoreOptions = () => {
  browser.storage.sync.get(
    { favoriteColor: 'red', likesColor: true },
    (items) => {
      document.getElementById('color').value = items.favoriteColor;
      document.getElementById('like').checked = items.likesColor;
    }
  );
};

document.addEventListener('DOMContentLoaded', restoreOptions);
document.getElementById('save').addEventListener('click', saveOptions);
最後に、拡張機能のマニフェスト ファイルに "storage" 権限を追加します。
manifest.json:
{
  "name": "My extension",
  ...
  "permissions": [
    "storage"
  ]
  ...
}
オプション ページの動作を宣言する
拡張機能のオプション ページには、フルページと埋め込みの 2 種類があります。オプション ページのタイプは、マニフェストでの宣言方法によって決まります。
フルページのオプション
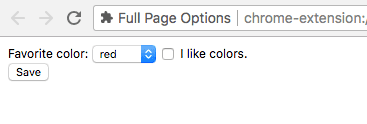
新しいタブに全ページ オプション ページが表示されます。"options_page" フィールドの manifest でオプションの HTML ファイルを登録します。
manifest.json:
{
  "name": "My extension",
  ...
  "options_page": "options.html",
  ...
}
埋め込みオプション
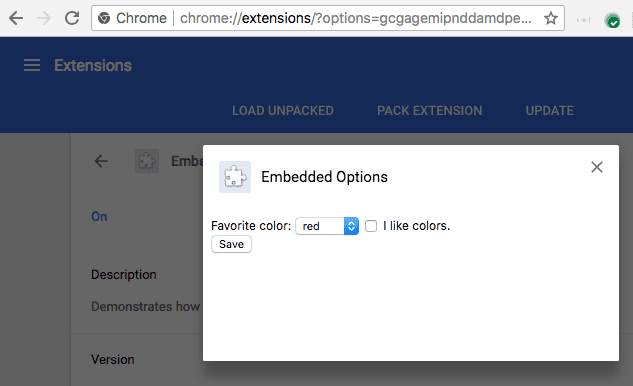
埋め込みオプション ページでは、埋め込みボックス内の拡張機能管理ページから移動せずに、拡張機能のオプションを調整できます。埋め込みオプションを宣言するには、拡張機能マニフェストの "options_ui" フィールドに HTML ファイルを登録し、"open_in_tab" キーを false に設定します。
manifest.json:
{
  "name": "My extension",
  ...
  "options_ui": {
    "page": "options.html",
    "open_in_tab": false
  },
  ...
}
page(文字列)- 拡張機能のルートを基準としたオプション ページのパスを指定します。
open_in_tab(ブール値)- 拡張機能のオプション ページを新しいタブで開くかどうかを示します。
falseに設定すると、拡張機能のオプション ページは新しいタブで開くのではなく、chrome://extensionsに埋め込まれます。
違いを考慮する
chrome://extensions 内に埋め込まれたオプション ページは、タブ内のオプション ページと動作がわずかに異なります。
オプション ページへのリンク
拡張機能は、browser.runtime.openOptionsPage() を呼び出すことで、オプション ページに直接リンクできます。たとえば、ポップアップに追加できます。
popup.html:
<button id="go-to-options">Go to options</button>
<script src="popup.js"></script>
popup.js:
document.querySelector('#go-to-options').addEventListener('click', function() {
  if (browser.runtime.openOptionsPage) {
    browser.runtime.openOptionsPage();
  } else {
    window.open(browser.runtime.getURL('options.html'));
  }
});
Tabs API
埋め込みオプション コードはタブでホストされないため、Tabs API は使用できません。オプション ページでタブを操作する必要がある場合は、代わりに runtime.connect() と runtime.sendMessage() を使用します。
Messaging API
拡張機能のオプション ページが runtime.connect() または runtime.sendMessage() を使用してメッセージを送信する場合、送信者のタブは設定されず、送信者の URL はオプション ページの URL になります。
サイズ
埋め込みオプションは、ページ コンテンツに基づいてサイズを自動的に決定する必要があります。ただし、埋め込みボックスでは、一部のタイプのコンテンツに適したサイズが見つからない場合があります。この問題は、ウィンドウ サイズに基づいてコンテンツの形状を調整するオプション ページで最もよく発生します。
この問題が発生する場合は、オプション ページの最小サイズを固定して、埋め込みページが適切なサイズを見つけられるようにします。