


Save changes you make in DevTools back to source files on your computer by setting up a workspace. You can automatically connect a workspace folder to DevTools by serving a configuration file, or you can manually add a workspace location in the Sources panel.
Overview
An automatic (or manual) connection to a workspace folder lets you save a change that you make in DevTools to a local copy of the same file on your computer. For example, suppose:
- You have the source code for your site on your desktop.
- You're running a local web server from the source code directory, so that the site is accessible
at
localhost:PORTand that also serves a simple JSON file with metadata (described later). - You've got
localhost:PORTopen in Google Chrome, and you're using DevTools to change the site's CSS.
With a workspace folder connected, the changes that you make in the Sources panel to CSS, HTML, and JavaScript files are saved to the source code on your computer. However, DevTools doesn't save changes to DOM that you make in the Elements panel.
Moreover, DevTools is usually able to map the optimized code back to your original source code with the help of source maps.
Generate metadata for a connection
To let DevTools discover your workspace folder automatically, generate a random version 4 UUID and put it in the following JSON file:
{
  "workspace": {
    "uuid": "UUID",
    "root": "path/to/project/root/folder"
  }
}
Then place the JSON file in path/to/project/root/folder/.well-known/appspecific/com.chrome.devtools.json.
Lastly, run your local HTTP server and make sure to serve the JSON file too.
Alternatively, you can skip this step and manually set up a folder connection.
Connect a workspace folder
To connect a folder:
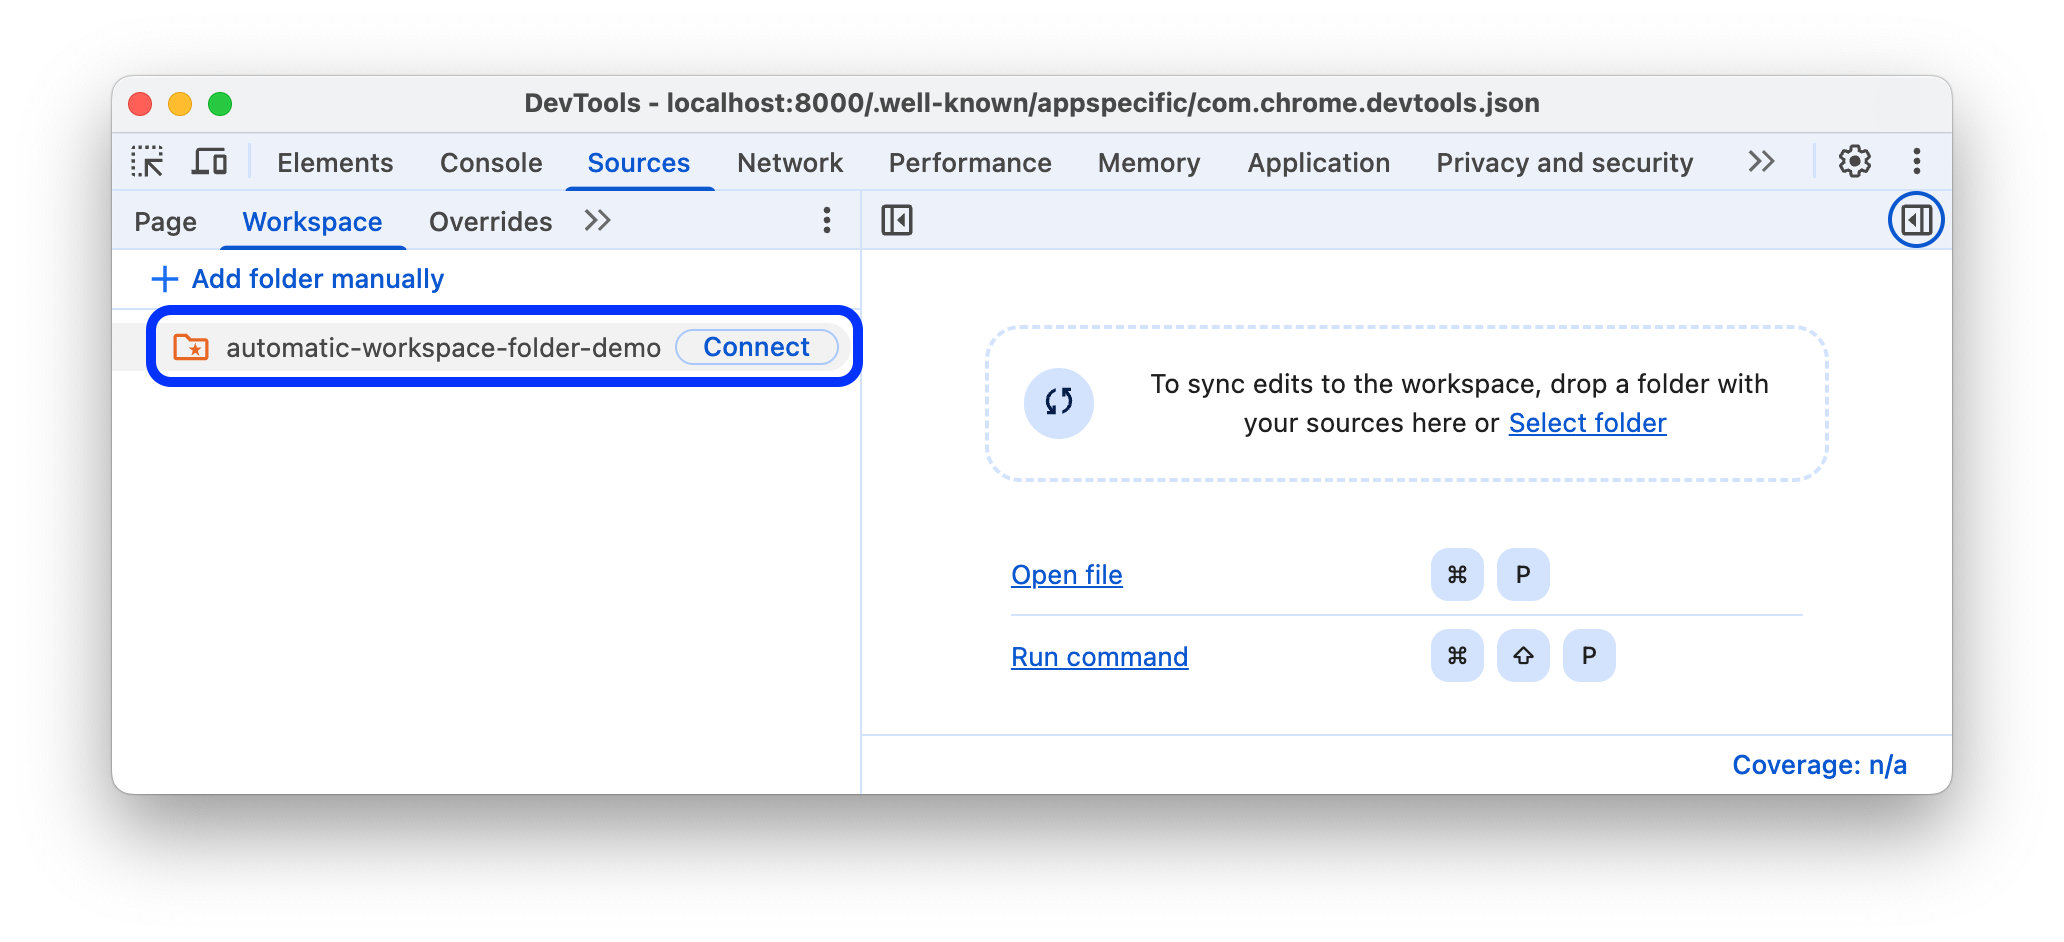
- In Chrome, navigate to your locally-hosted page (in this example, at
localhost:8000) and open DevTools. In Sources > Workspace, click Connect next to your folder.
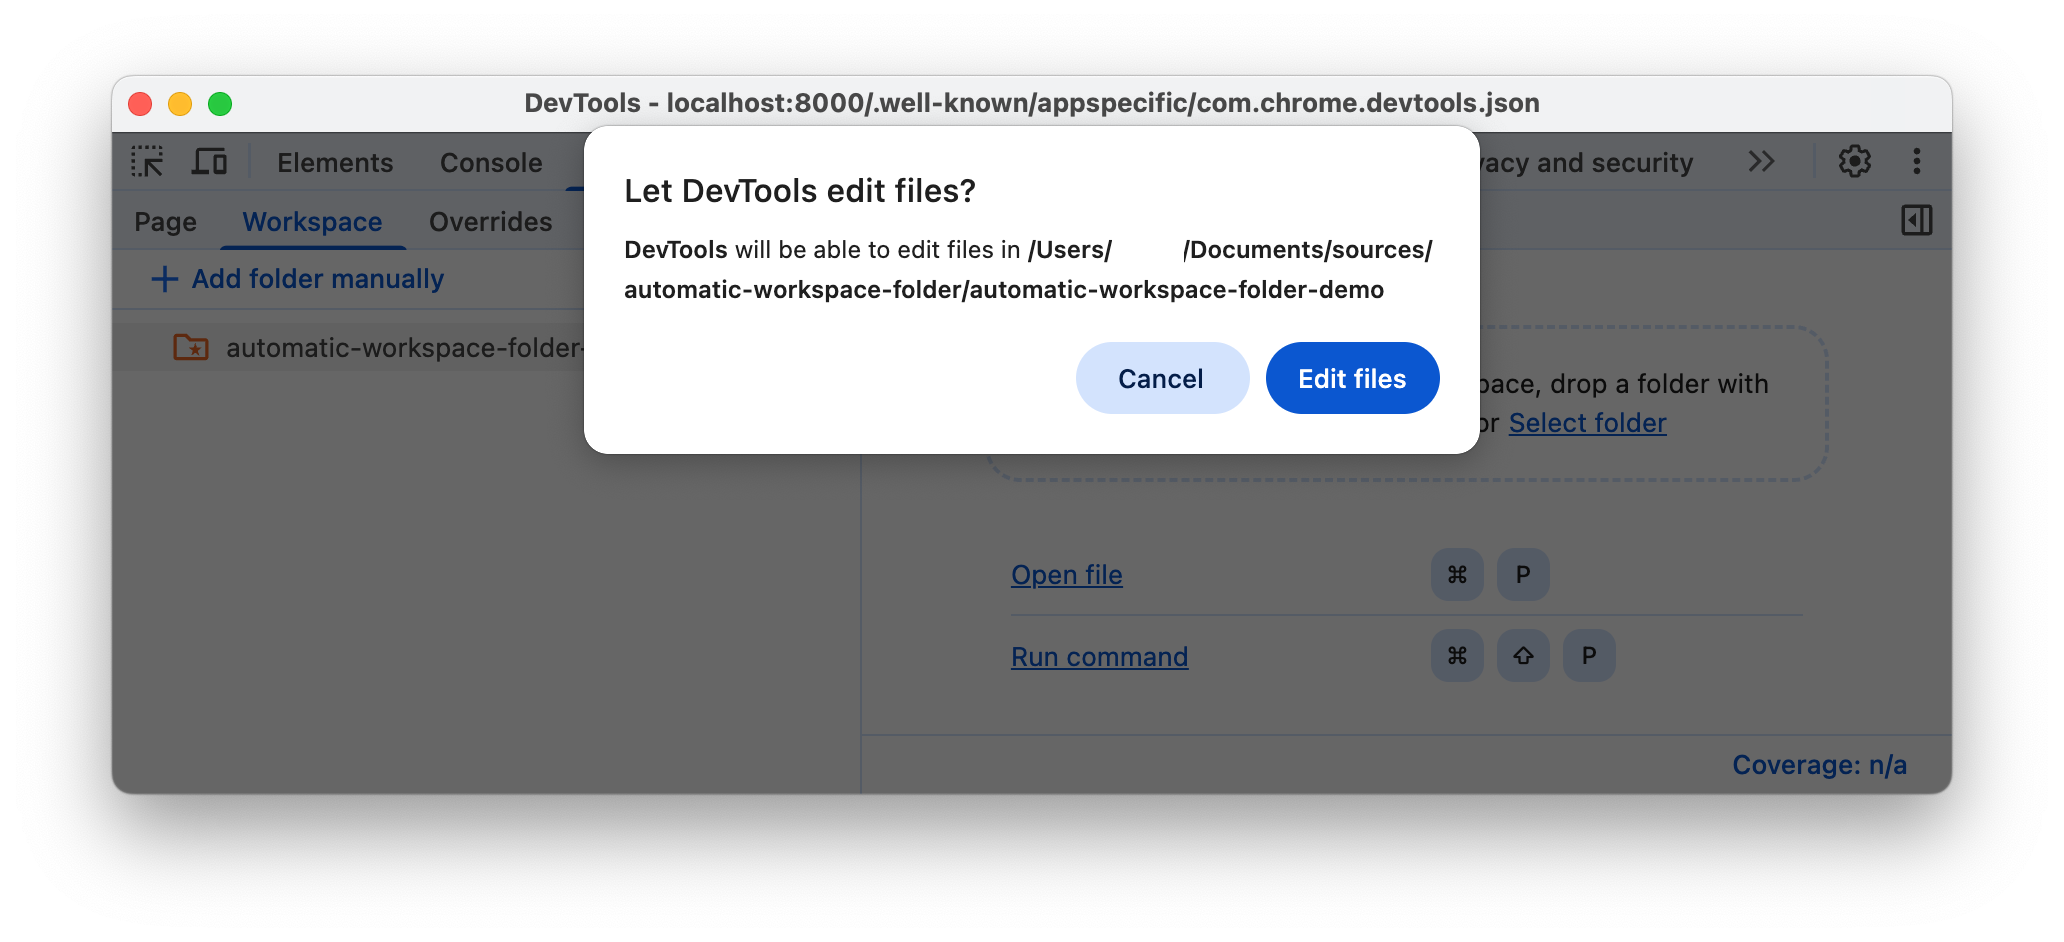
When prompted, click Edit files to allow DevTools access to your folder.
Once connected, you can open the folder in the Workspaces tab.
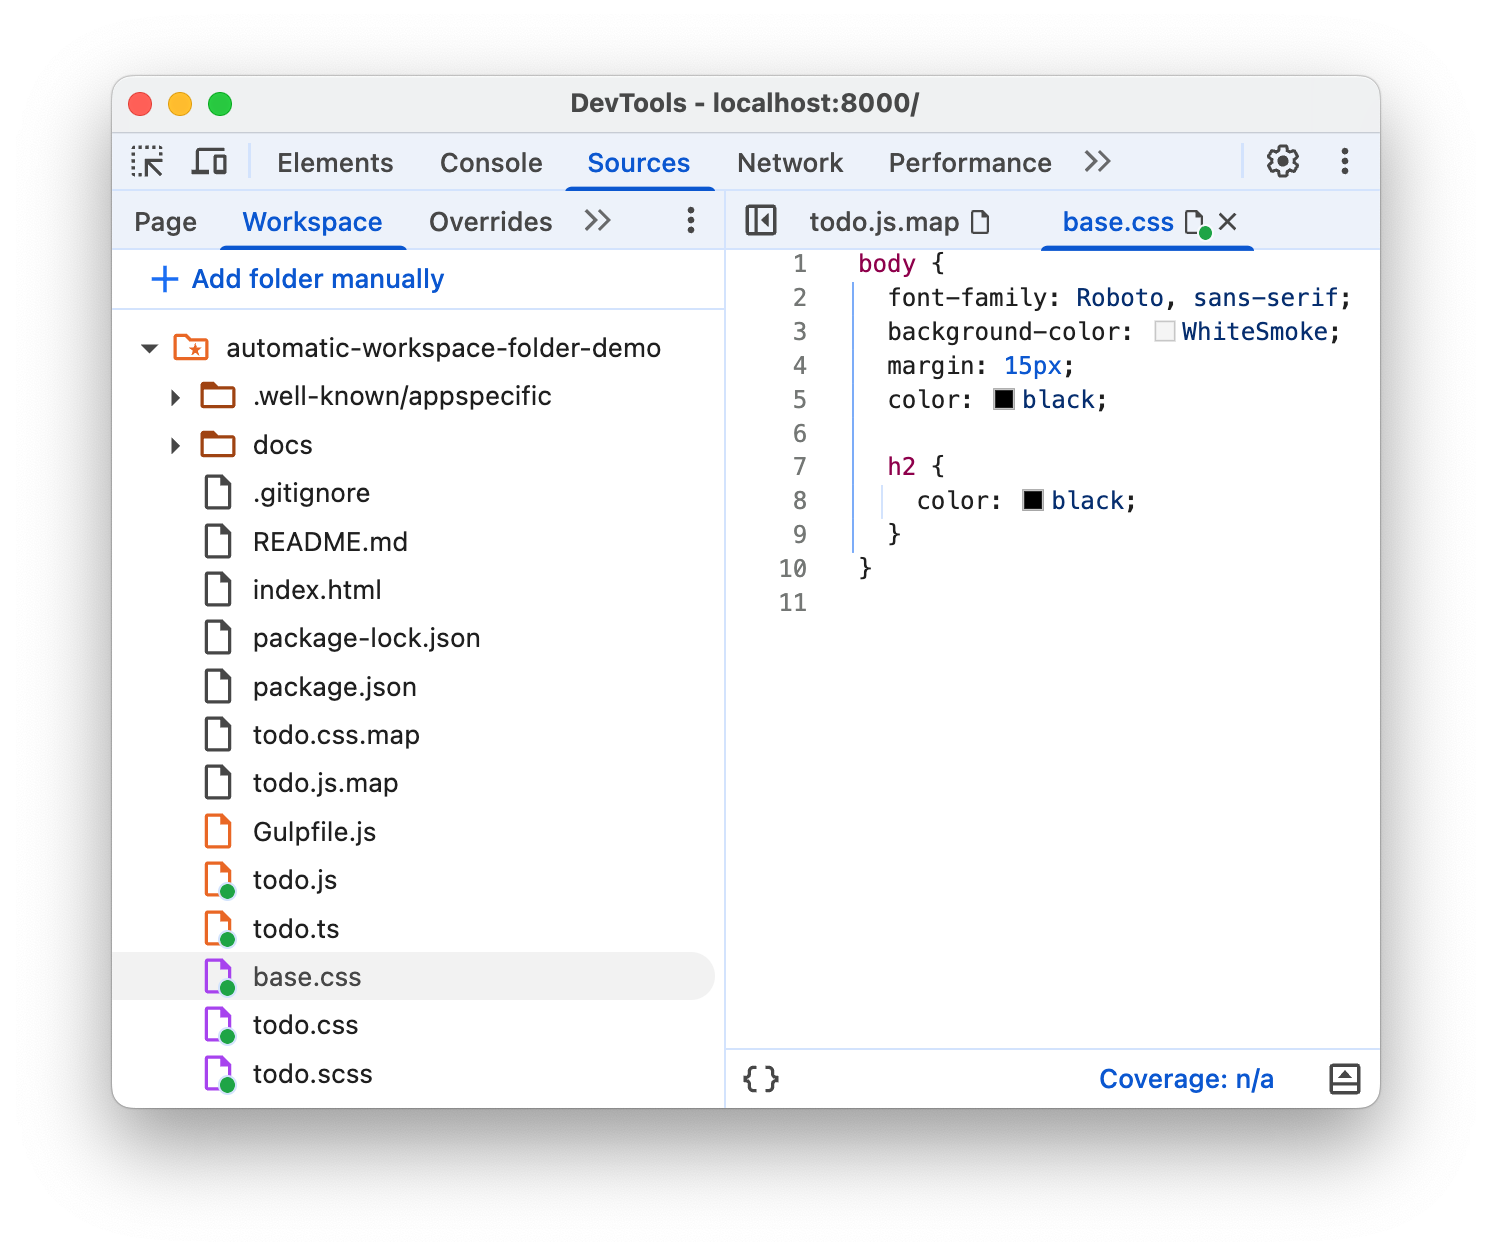
The Workspace tab shows you a green dot next to HTML, CSS, and JavaScript files. These green dots mean that DevTools has established a mapping between the network resources of the page, and the files in the folder.
Save a change back to source folder
You can save changes to any CSS, HTML, and JavaScript files in the connected workspace folder.
Save changes to CSS
To save changes to CSS:
- Open a CSS file from your connected workspace folder in Sources > Workspaces.
Make a change to your CSS.
Save the change, for example, by pressing Ctrl / Cmd + S and see the applied change back in your source file. The Sources panel shows you a green dot next to the filename.
To learn the workflow, watch the video:
Save changes to HTML
To save changes to HTML:
- Open an HTML file from your connected workspace folder in Sources > Workspaces.
Make a change to your HTML.
Save the change, for example, by pressing Ctrl / Cmd + S and see the applied change back in your source file. The Sources panel shows you a green dot next to the filename.
Reload the page to see the change take effect.
To learn the workflow, watch the video:
Why can't you change HTML from the Elements panel?
- The tree of nodes that you see on the Elements panel represents the page's DOM.
- To display a page, a browser fetches HTML over the network, parses the HTML, and then converts it into a tree of DOM nodes.
- If the page has any JavaScript, that JavaScript may add, delete, or change DOM nodes. CSS can
change the DOM, too, with the
contentproperty. - The browser eventually uses the DOM to determine what content it should present to browser users.
- Therefore, the final state of the page that users see may be very different from the HTML that the browser fetched.
- This makes it difficult for DevTools to resolve where a change made in the Elements panel should be saved, because the DOM is affected by HTML, JavaScript, and CSS.
In short, the DOM Tree !== HTML.
Save changes to JavaScript
To save changes to JavaScript:
- Open a JavaScript file from your connected workspace folder in Sources > Workspaces.
Make a change to your JavaScript.
Save the change, for example, by pressing Ctrl / Cmd + S and see the applied change back in your source file. The Sources panel shows you a green dot next to the filename.
If your local HTTP server listens for live source file changes and reloads the page automatically, you'll see the changes applied once you save them in DevTools. Otherwise, redeploy your local server.
To learn the workflow, watch the video:
Remove a workspace folder connection
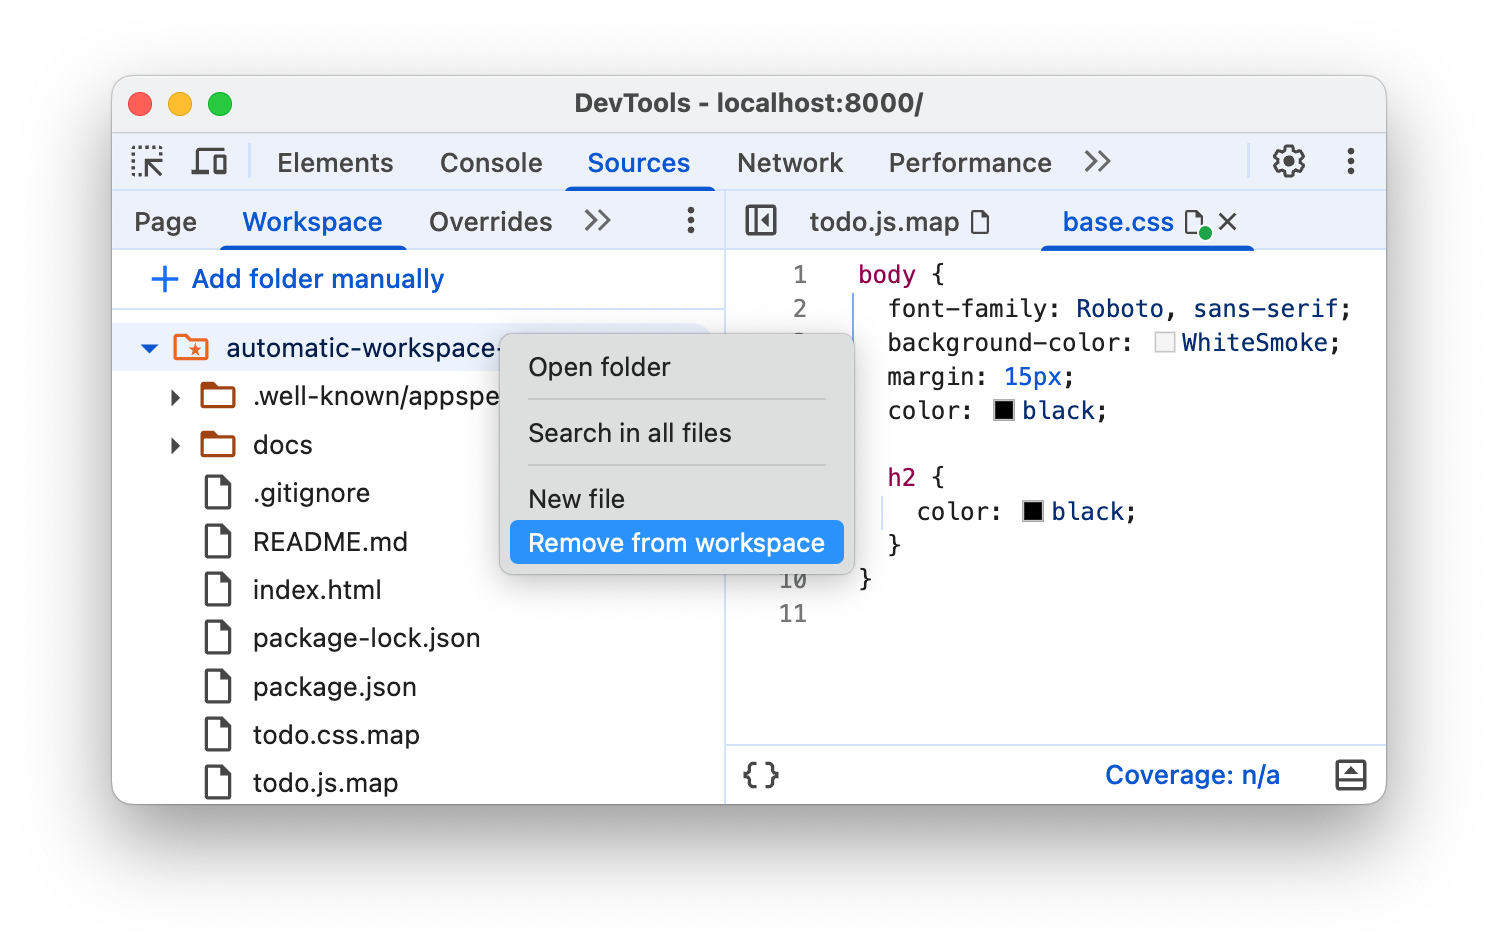
To remove a workspace folder connection, in Sources > Workspace, right-click the folder, select Remove from workspace from the drop-down menu, and click Remove.
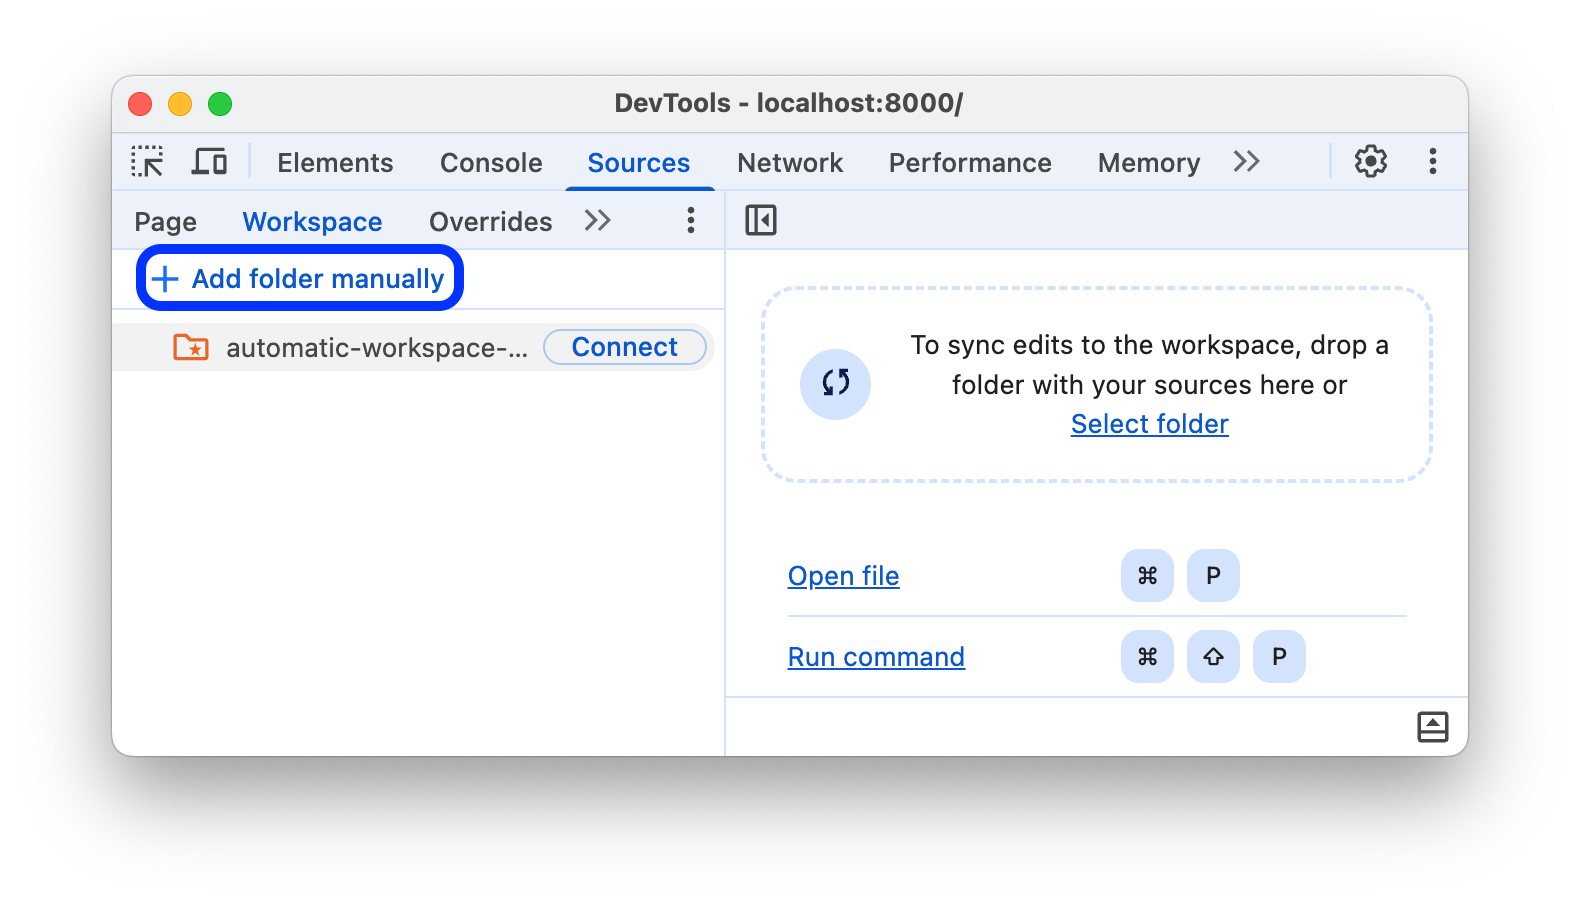
Manually connect a workspace folder
Open DevTools on your locally-hosted page.
In Sources > Workspace, click Add folder manually. Then select a folder with your source files.
Then follow step 3 and 4 in Connect a workspace folder.
Limitations
If you're using a modern framework, it probably transforms your source code from a format that's easy for you to maintain into a format that's optimized to run as quickly as possible. A workspace folder connection is usually able to map the optimized code back to your original source code with the help of source maps.
The DevTools community works to support the capabilities provided by source maps across a variety of frameworks and tools. If you run into issues while using a workspace with your framework of choice, or you get it working after some custom configuration, start a thread in the mailing list or ask a question on Stack Overflow to share your knowledge with the rest of the DevTools community.
Next steps
All the already set up folders you can manage under ![]() Settings > Workspace.
Settings > Workspace.
Next, learn how to use DevTools to change CSS and debug JavaScript.
See also
Local overrides is another DevTools somewhat similar feature that lets you mock web content or request headers. This way, you freely experiment with changes to a page without waiting for backend to catch up. With local overrides, the changes persist across page loads but don't map to your page's source code.